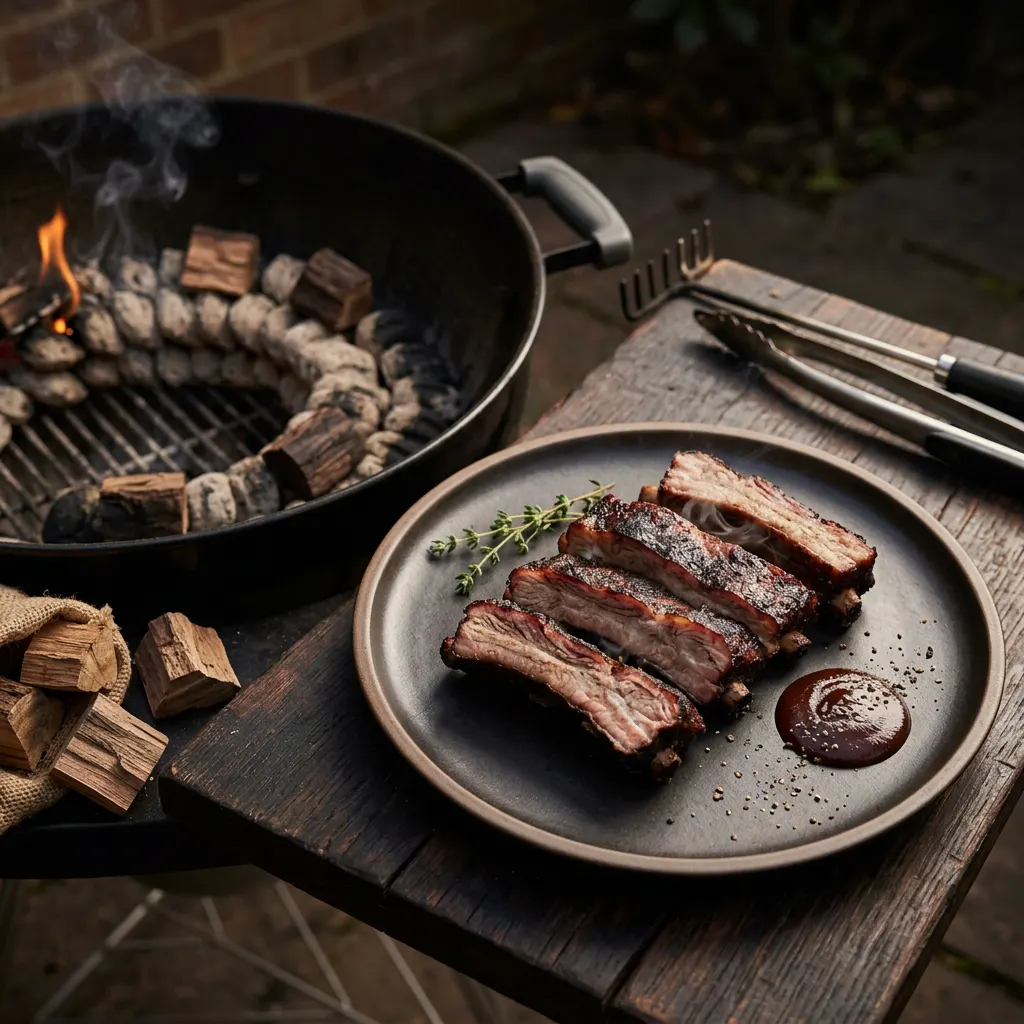
Apple-Smoked Snake-Method Kettle Ribs
Charcoal kettle, snake of briquettes, hickory chunks every six.
Cook Mode
One step at a time, big text, timers, and your screen stays awake. 0/20 steps done.
Ingredients
Tap to tick off · 0/17 gathered
Method
- 20 min
Remove the membrane from the back of each rib rack. Trim any excessively loose or small pieces of meat. Apply a thin coat of yellow mustard as a binder, then generously coat all sides with your BBQ rub.
Why it matters
Removing the membrane ensures a tender bite and allows smoke and rub to penetrate evenly. The mustard acts as a binder to help the rub adhere without adding noticeable flavor.
Common mistake
Leaving the membrane on creates a chewy, unappetizing layer that prevents seasoning absorption.
- 30 min
Remove the membrane from the back of each rib rack. Trim any excess fat or ragged edges. Apply a thin coat of yellow mustard as a binder, then generously coat both sides of the ribs with BBQ rub. Let sit at room temperature while preparing the grill.
Why it matters
Removing the membrane ensures a more tender bite and allows the smoke and rub to penetrate the meat better. The mustard acts as an excellent binder for the rub without imparting a strong mustard flavor.
Common mistake
Forgetting to remove the membrane results in chewy, less flavorful ribs.
- 30 min
Remove the membrane from the back of the ribs. Trim any excessive fat or loose meat. Slather the ribs evenly with yellow mustard, then generously apply your chosen BBQ rub to all sides. Let the ribs sit out at room temperature while you prepare the smoker.
Why it matters
Removing the membrane ensures a tender bite and allows smoke and rub flavors to penetrate the meat more effectively. The mustard acts as a binder, helping the rub adhere, and its flavor dissipates during cooking.
Common mistake
Neglecting to remove the membrane, leaving a chewy, undesirable texture.
- 250°F30 min
Arrange briquettes in a 'snake' formation around the perimeter of your kettle grill, two briquettes wide and two briquettes high. Place a foil pan filled with water in the center of the grill under where the ribs will sit. Place hickory wood chunks evenly spaced on top of the snake (about every 6 briquettes). Light one end of the snake with about 8-10 briquettes in a charcoal chimney, wait for them to ash over, then place them at the start of your snake.
Why it matters
The snake method allows for a long, consistent burn at a low temperature, ideal for smoking ribs. The water pan helps regulate temperature and adds moisture to the cooking environment, preventing the ribs from drying out.
Common mistake
Overloading the snake with too many lit briquettes, causing the temperature to spike too high.
- 15 min
Arrange your charcoal briquettes in a 'snake' formation along the perimeter of the charcoal grate. This means stacking two briquettes high, with another layer on top of the first layer, creating a semi-circle. Place a hickory chunk on top of every sixth briquette in the snake.
Why it matters
The snake method allows for a long, consistent burn at a low temperature by sequentially igniting briquettes. Spacing the wood chunks ensures a steady, even smoke flavor throughout the cook.
Common mistake
Not stacking the briquettes correctly will lead to uneven burning and temperature fluctuations. Not enough wood chunks will result in less smoke flavor.
- 20 min
On one side of your kettle grill, arrange a double row of charcoal briquettes in a 'C' or 'U' shape around the perimeter. Then, stack a single row of briquettes on top of the first double row. Place a drip pan in the center of the grill below where the ribs will sit. Nestle hickory wood chunks on top of every 6th briquette along the snake.
Why it matters
The snake method allows for a long, consistent burn at a low temperature, perfect for smoking ribs without constant tending. The drip pan catches rendering fat and helps maintain moisture.
Common mistake
Not placing wood chunks frequently enough can lead to an inconsistent smoke flavor. Too many chunks can result in over-smoked meat.
- 250°F30 min
Light 8-10 briquettes in a charcoal chimney. Once fully ashed over, place them at one end of your charcoal snake. Close the lid, ensuring the bottom vent is mostly open and the top vent is directly over the ribs (opposite the lit charcoal) to draw smoke across the meat. Adjust vents to achieve a stable temperature of 250°F.
Why it matters
Proper vent control is crucial for maintaining a consistent temperature in a kettle grill. Stabilizing the temperature before adding the meat prevents temperature spikes and ensures an even cook.
Common mistake
Opening the lid too frequently to check the temperature disrupts the airflow and prolongs the stabilization time.
- 250°F30 min
Light about 8-10 briquettes in a charcoal chimney starter. Once ashed over, place them at one end of the snake. Add a water pan filled with warm water directly under where the ribs will sit. Close the lid, adjust the vents to achieve a stable smoker temperature of 250°F. This typically means the bottom vent is open 1/4 to 1/2 way and the top vent is 1/2 to 3/4 open.
Why it matters
Pre-lighting a small number of briquettes starts the snake without creating a large flare-up, allowing for precise temperature control from the start. The water pan helps stabilize temperature and adds moisture to the cooking environment, preventing the ribs from drying out.
Common mistake
Adding too many lit briquettes at once can cause the smoker temperature to overshoot and burnout the snake too quickly. Not stabilizing the temperature before adding meat leads to an inconsistent cook.
- 250°F1h 30m
After 3 hours, remove the ribs from the smoker. Lay out a large piece of heavy-duty aluminum foil. Place 2 tablespoons of butter, 2 tablespoons of brown sugar, and 1 tablespoon of honey on the foil, spreading slightly. Place a rack of ribs bone-side up on top of this mixture. Repeat for the second rack. Wrap the ribs tightly in the foil, creating a sealed packet.
Why it matters
Wrapping the ribs in foil, often called the 'Texas Crutch,' tenderizes them quickly by steaming them in their own juices and added liquids. The butter, sugar, and honey add moisture, sweetness, and enhance the flavor profile.
Common mistake
Not sealing the foil tightly, allowing steam to escape and reducing the effectiveness of the crutch.
- 250°F3h
Once the smoker is stable at 250°F (monitor with a reliable probe thermometer), place the seasoned rib racks bone-side down on the grate, directly above the water pan but not directly over the lit coals. Close the lid and maintain temperature.
Why it matters
This initial phase is crucial for smoke penetration and bark development. Keeping the ribs away from direct heat prevents burning and allows for slow, even cooking.
Common mistake
Opening the lid too frequently to check on the ribs will cause significant temperature drops, extending the cook time and reducing smoke penetration.
- 250°F3h
Once the smoker is stable at 250°F, place the ribs directly on the grill grates, ensuring they are not directly over the lit charcoal. Close the lid and smoke the ribs, spritzing with apple cider vinegar every 60 minutes.
Why it matters
This initial phase develops the smoke ring and sets the bark. Spritzing keeps the surface moist, preventing it from drying out and promoting better smoke adhesion.
Common mistake
Placing ribs directly over the hot charcoal can char them instead of smoking properly.
- 250°F1h 30m
After 3 hours, remove the ribs from the grill. Lay out two large sheets of heavy-duty aluminum foil. On each sheet, sprinkle brown sugar, drizzle honey, and place two pats of butter. Place one rack of ribs meat-side down on the prepared foil. Wrap tightly, creating a sealed pouch. Return to the grill.
Why it matters
Wrapping the ribs (the 'crutch') helps tenderize them by steaming them in their own juices and the added liquids, plus it helps accelerate the cooking process through the stall. The sugar, honey, and butter add moisture and enhance flavor.
Common mistake
Not sealing the foil tightly can cause the steaming effect to be lost, leading to tougher ribs.
- 250°F1h
Place the wrapped ribs back on the smoker, over the water pan, and continue to cook for another 90 minutes. At the end of this period, check for doneness by the 'bend test' – hold the ribs at one end with tongs, and if they bend significantly without breaking, they are ready. You can also check for internal temperature in the thickest part of the meat (avoiding bone) around 200-205°F.
Why it matters
This final unwrapped phase allows the bark to firm up and prevents the ribs from becoming too mushy. The bend test is a reliable indicator of optimal tenderness, where the collagen has broken down.
Common mistake
Undercooking the ribs, resulting in tough meat that's difficult to pull from the bone.
- 250°F2h
After 3 hours, open the lid and spritz the ribs lightly with an equal mix of apple cider vinegar and water. On heavy-duty aluminum foil, create a 'boat' for each rack of ribs, then tightly seal the foil around them. Return the wrapped ribs to the smoker.
Why it matters
Spritzing adds moisture and helps create 'pull-back'. Wrapping the ribs helps them steam, tenderizing them significantly and preventing the bark from getting too dark. The foil holds in moisture and heat, accelerating the tenderization process.
Common mistake
Wrapping too early can prevent good bark formation. Not sealing the foil tightly will allow moisture to escape, hindering the steaming effect.
- 250°F30 min
After 2 hours wrapped, carefully remove the ribs from the foil. Be cautious as they will be very tender. Optionally, brush with your favorite BBQ sauce. Place the unwrapped ribs back on the smoker grate for a final crisping and to set the sauce if used.
Why it matters
Unwrapping allows the exterior to firm up and, if sauced, allows the sauce to caramelize and adhere. This step develops the final texture and flavor.
Common mistake
Leaving the ribs wrapped for too long can result in an overly mushy texture. Over-saucing can make the ribs too sweet and mask the smoke flavor.
- 30 min
Once the ribs pass the bend test, remove them from the smoker. You can either leave them wrapped in their foil or loosely tent them with foil. Let them rest on a cutting board for at least 30 minutes, or up to an hour.
Why it matters
Resting allows the internal temperature to equalize and the juices to redistribute throughout the meat, resulting in a more tender and moist product. Slicing too early can cause juices to run out, drying out the ribs.
Common mistake
Slicing the ribs immediately after removing them from the heat, leading to dry and less flavorful meat.
- 250°F1h
After 90 minutes in the crutch, carefully unwrap the ribs. If desired, brush with BBQ sauce. Return the unwrapped ribs to the grill for the last hour.
Why it matters
Unwrapping allows the bark to firm up again and for the BBQ sauce (if used) to caramelize, adding another layer of flavor and texture.
Common mistake
Applying BBQ sauce too early can cause it to burn due to the sugar content.
- 30 min
Once the ribs are tender (they should bend significantly when lifted from one end, and the meat should have pulled back slightly from the bones), remove them from the grill. Tent loosely with foil and let them rest.
Why it matters
Resting allows the muscle fibers to relax and reabsorb juices, resulting in more tender and moist ribs. Cutting them immediately can cause juices to run out, leaving dry meat.
Common mistake
Cutting immediately after removing from the heat results in dry ribs.
- 30 min
Once the ribs are tender (they should bend easily and meat should pull back from the bone), remove them from the smoker. Tent lightly with foil and let rest on a cutting board.
Why it matters
Resting allows the muscle fibers to relax and reabsorb juices, resulting in a more tender and moist finished product. Skipping this step leads to dry ribs.
Common mistake
Cutting into the ribs immediately after cooking will cause all the accumulated juices to run out, resulting in dry meat.
After resting, slice the ribs between the bones and serve immediately with any remaining BBQ sauce on the side.
Why it matters
Proper slicing ensures each piece is clean and presentable, and serving immediately ensures the ribs are enjoyed at their peak temperature and texture.
Common mistake
Slicing across the bones or unevenly can make them difficult to eat and less appealing.
Sauce It
Cooks & Reviews
Guild members can rate this recipe, log their cooks and share photos.
Sign in to continueMember reviews
No reviews yet — be the first to rate this cook.
Ask the Pitmaster about this recipe
Substitutions, scaling, technique, troubleshooting — get answers grounded in this cook.
Sign in to try the AI Pitmaster on Apple-Smoked Snake-Method Kettle Ribs. New members get 3 free questions.
Sign in to tryComments(0)
Loading comments…