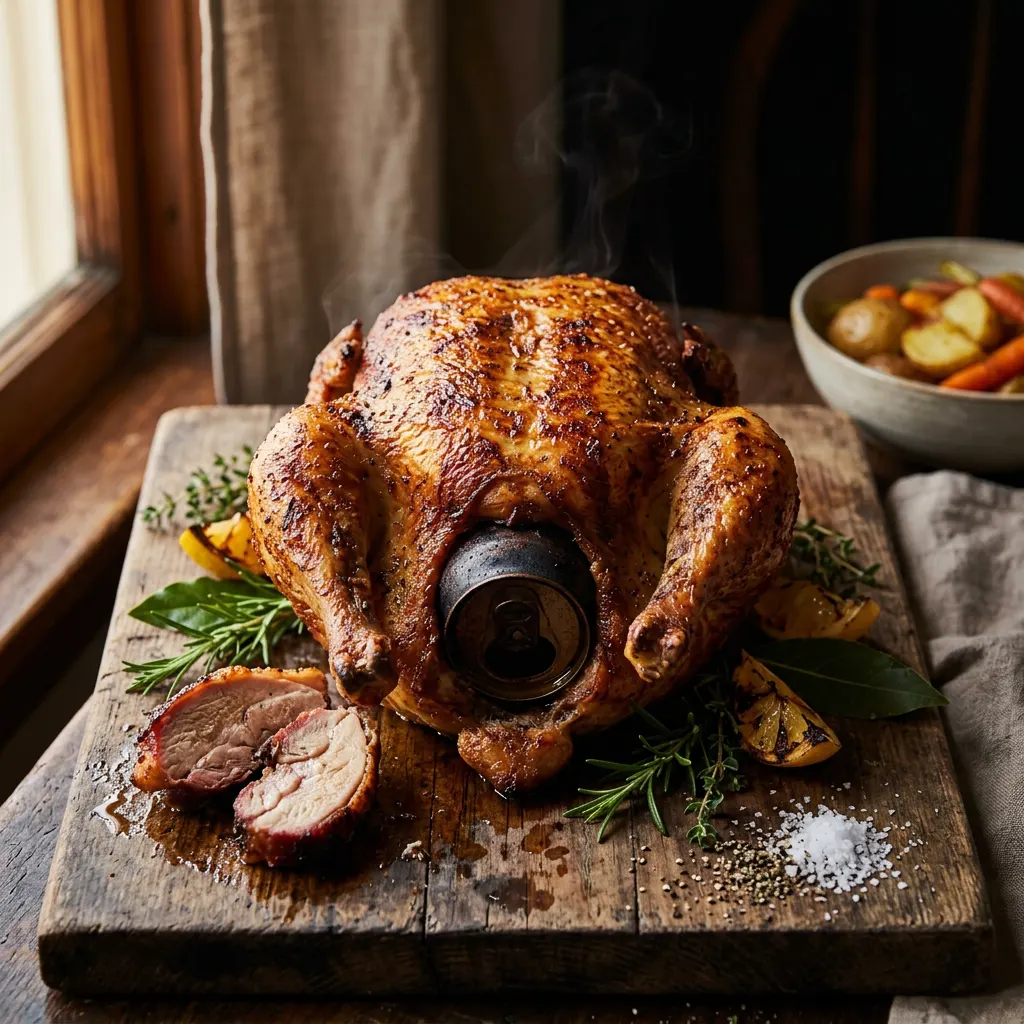
Herb-Rubbed Beer-Can Whole Chicken
Crispy skin, juicy bird, straightforward backyard cook.
Cook Mode
One step at a time, big text, timers, and your screen stays awake. 0/14 steps done.
Ingredients
Tap to tick off · 0/13 gathered
Method
- 15 min
Pat the whole chicken thoroughly dry with paper towels, both inside and out. In a small bowl, combine kosher salt, black pepper, paprika, garlic powder, onion powder, and dried thyme. Drizzle the chicken with olive oil and rub it all over, then sprinkle the seasoning mix evenly over the entire surface of the bird, ensuring good coverage. Make sure to get some seasoning under the chicken skin on the breast.
Why it matters
A dry surface is crucial for crispy skin. The oil helps the seasoning adhere and promotes even browning, while seasoning under the skin ensures flavor penetrates the meat.
Common mistake
Not drying the chicken enough results in steamed, rubbery skin instead of crispy.
- 15 min
Pat the whole chicken dry with paper towels. Rub the entire bird with olive oil. In a small bowl, mix together the kosher salt, black pepper, garlic powder, and paprika. Generously apply the rub all over the chicken, including under the wings and legs.
Why it matters
A dry surface helps the skin crisp up, and the olive oil acts as a binder for the rub, ensuring even seasoning.
Common mistake
Not drying the chicken thoroughly, leading to rubbery skin.
- 5 min
Open the can of beer and pour out (or drink!) about 1/4 to 1/3 of the beer, leaving the rest in the can. Optionally, add a clove of garlic or a sprig of rosemary to the beer for added aromatics.
Why it matters
The steam from the beer helps keep the chicken breast moist and infuses subtle flavor from the inside out.
Common mistake
Using a full can of beer can make the chicken unstable on the grill and doesn't allow for enough steam generation.
- 325°F20 min
Preheat your pellet grill or smoker to 325°F (163°C). Add apple wood pellets to the hopper. If desired, place a drip pan with about 1/2 cup of chicken broth directly under where the chicken will sit on the grates.
Why it matters
A higher smoker temperature helps render the fat in the skin, leading to a crispy finish, while the apple wood provides a mild, sweet smoke flavor. The drip pan helps keep the cooking environment moist and catches drippings.
Common mistake
Not allowing enough time for the smoker to reach and stabilize at the target temperature.
- 325°F15 min
Set your smoker to 325°F (163°C). Add apple wood chunks or pellets to the smoker for a mild, fruity smoke flavor.
Why it matters
A precise starting temperature is key for even cooking and proper skin crisping. Apple wood is a great choice for chicken, imparting a subtle sweetness.
Common mistake
Not allowing the smoker to fully come to temperature before putting the chicken in, leading to inconsistent cooking.
- 325°F20 min
Preheat your pellet grill or smoker to 325°F (163°C). Add apple wood pellets to the hopper or wood chips to your smoke box. Ensure your water pan (if applicable) is full.
Why it matters
Preheating ensures a stable cooking environment. Apple wood provides a mild, sweet smoke that complements chicken. The higher temperature is key for rendering fat and crisping the skin.
Common mistake
Putting the chicken on before the smoker is at a stable temperature leads to uneven cooking.
- 325°F1h 30m
Carefully place the chicken, standing upright on its beer can, directly onto the grates of your preheated smoker. Insert a probe thermometer into the thickest part of the chicken thigh, avoiding the bone.
Why it matters
Cooking at this higher temperature helps render the fat in the skin, giving you that desirable crispy exterior, while the internal probe ensures precise doneness.
Common mistake
Opening the smoker door too frequently, which causes temperature fluctuations and extends cooking time.
- 325°F
Carefully transfer the chicken (still on its beer can) to the preheated smoker. Stand it upright on the grill grates. Close the lid and let the smoke do its work.
Why it matters
Smoking upright ensures even heat distribution and allows the skin to crisp all around.
Common mistake
Fussing with the chicken or opening the smoker lid too often, which causes temperature fluctuations.
- 325°F
Carefully place the chicken by lowering its cavity over the open beer can, so the can is upright inside the chicken and it stands as if sitting on its 'throne'. Transfer the chicken to the preheated smoker. If using a digital probe thermometer, insert the probe into the thickest part of the thigh, avoiding the bone.
Why it matters
This upright position allows for even cooking, better air circulation around the bird, and ensures the steam from the beer can penetrate the breast meat.
Common mistake
Inserting the thermometer too close to the bone, which will give an inaccurate, higher temperature reading.
- 325°F2h
Smoke the chicken at 325°F (163°C) until the internal temperature in the thickest part of the thigh reaches 175-180°F (79-82°C) and the breast reaches 165°F (74°C). This will typically take about 90 to 120 minutes. You can baste with chicken broth every 30-40 minutes for extra moisture, if desired.
Why it matters
Cooking to the correct internal temperature ensures the chicken is safe to eat and perfectly cooked – juicy in the breast and tender in the thighs.
Common mistake
Overcooking leads to dry, tough chicken, especially the breast meat.
- 30 min
Continue smoking until the internal temperature in the thickest part of the thigh reaches 170-175°F (77-79°C). The breast meat should also be around 160-165°F (71-74°C) at this point.
Why it matters
Monitoring individual zones ensures all parts of the bird are cooked perfectly without drying out.
Common mistake
Overcooking the breast to ensure the thigh reaches temperature, leading to dry breast meat.
- 20 min
Once the target internal temperatures are reached, carefully remove the chicken from the smoker, still upright on its can. Transfer it to a cutting board and allow it to rest for at least 15-20 minutes. It is critical to carefully remove the chicken WITHOUT spilling the hot can contents.
Why it matters
Resting allows the juices to redistribute throughout the chicken, ensuring a moist and flavorful result. The temperature will also rise a few degrees during this time (carryover cooking).
Common mistake
Cutting into the chicken immediately after removing it from the smoker, which causes all the flavorful juices to escape.
- 20 min
Once the desired internal temperature is reached, carefully remove the chicken (still on the beer can) from the smoker. Transfer it to a cutting board and tent loosely with aluminum foil. Let it rest for 15-20 minutes.
Why it matters
Resting allows the juices to redistribute throughout the meat, preventing them from running out when you carve and ensuring a more tender, flavorful result.
Common mistake
Carving immediately after cooking, which causes the juices to escape, leading to dry meat.
- 10 min
Carefully remove the chicken from the beer can (the can will be hot!). Discard the can. Carve the chicken into preferred pieces – separate thighs, drumsticks, breasts, and wings. Serve immediately with your favorite sides.
Why it matters
Proper carving ensures each piece is ready to enjoy and allows for easy portioning.
Common mistake
Not being cautious when removing the hot beer can, which can cause burns.
Sauce It
Free Guide
5 Techniques Competition Smokers Use That Home Cooks Don't
Join the Guild email list and we'll send you the free guide — the exact moves that separate backyard cooks from competition pitmasters.
Cooks & Reviews
Guild members can rate this recipe, log their cooks and share photos.
Sign in to continueMember reviews
No reviews yet — be the first to rate this cook.
Ask the Pitmaster about this recipe
Substitutions, scaling, technique, troubleshooting — get answers grounded in this cook.
Sign in to try the AI Pitmaster on Herb-Rubbed Beer-Can Whole Chicken. New members get 3 free questions.
Sign in to tryComments(0)
Loading comments…