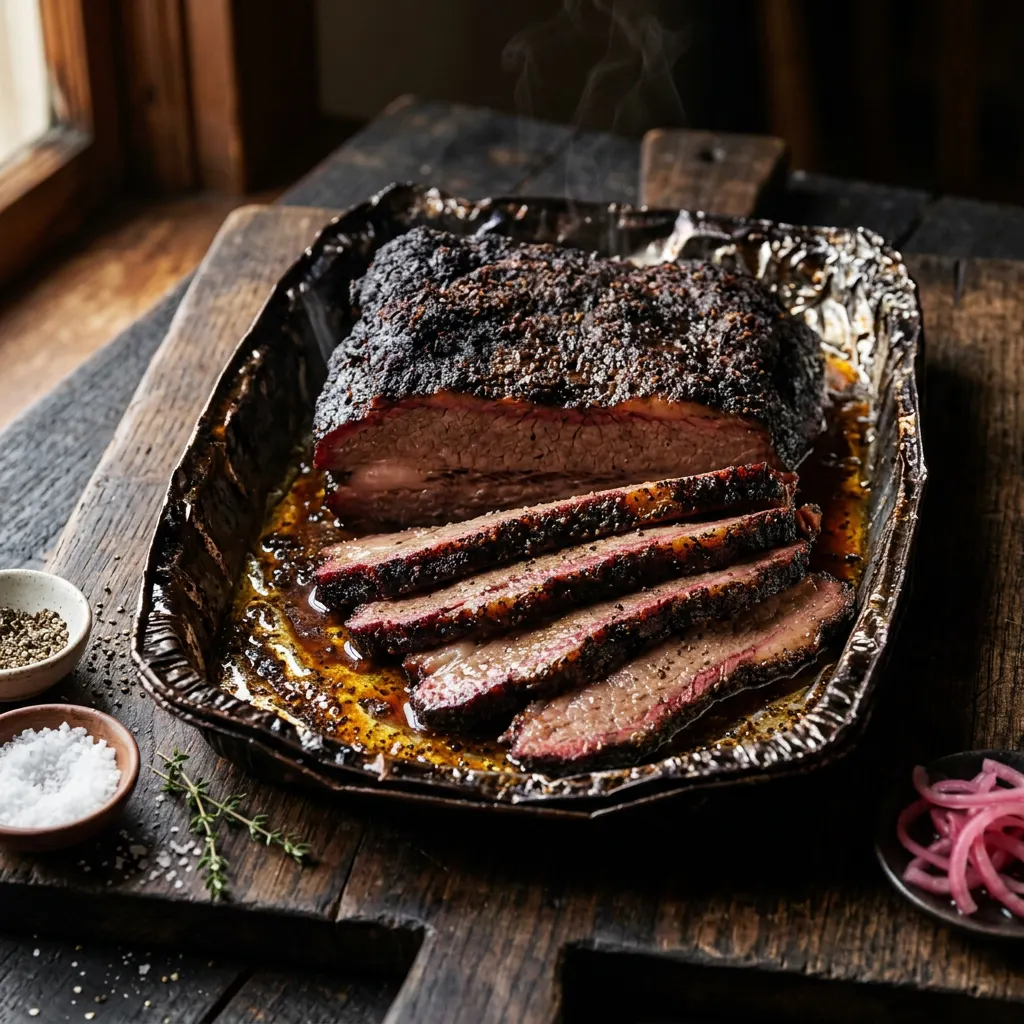
Simple Foil-Boat Brisket
Naked bark for 6 hours, then unwrapped foil boat to finish.
Cook Mode
One step at a time, big text, timers, and your screen stays awake. 0/22 steps done.
Ingredients
Tap to tick off · 0/19 gathered
Method
- 30 min
Trim the hard, flaky fat from the flat and the deckle. Leave an even 1/4 inch of fat on the point side. Remove any silver skin. Square up the edges slightly.
Why it matters
Proper trimming ensures even cooking and allows the rub to penetrate effectively, creating a better bark. It also removes undesirable textures.
Common mistake
Over-trimming the fat, which can lead to a dry brisket.
- 30 min
Trim the fat cap down to about 1/4 inch thickness. Remove any hard fat or silver skin. Mix salt, pepper, paprika, and garlic powder to create the rub. Apply an even layer of rub over the entire brisket, ensuring good coverage on all sides.
Why it matters
Proper trimming ensures even cooking and an optimal bark. A balanced rub creates a flavorful crust.
Common mistake
Over-trimming the fat cap can lead to a dry brisket, while under-trimming results in unrendered, rubbery fat.
- 250°F30 min
Preheat your smoker to 250°F (121°C). Add your Post Oak wood chunks to establish a clean, consistent smoke. Ensure your water pan is full if your smoker uses one.
Why it matters
A stable temperature and clean smoke are crucial for developing deep smoky flavor and a good bark without off-flavors.
Common mistake
Rushing the preheating process or using too much wood upfront can lead to thick, acrid smoke, leaving a bitter taste.
- 15 min
Mix kosher salt, black pepper, and granulated garlic to create your rub. Apply a generous, even layer to all sides of the brisket. Make sure to get the edges.
Why it matters
The rub is the foundation of your bark and flavor. An even application ensures consistent seasoning and bark development.
Common mistake
Not applying enough rub, resulting in a bland bark.
- 2h
Mix black pepper, kosher salt, and granulated garlic to create your rub. Liberally apply the rub to all surfaces of the trimmed brisket. Allow the brisket to sit at room temperature for 1-2 hours.
Why it matters
Allowing the brisket to sit with the rub at room temperature not only brings the meat temperature up slightly, but also allows the salt to start drawing moisture out and creating a pellicle, which helps with smoke adhesion.
Common mistake
Applying a rub to a cold brisket straight from the fridge; the rub won't adhere as well.
- 250°F30 min
Preheat your smoker to 250°F. Add Post Oak wood chunks to the firebox for clean smoke.
Why it matters
A stable temperature and clean, consistent smoke are crucial for developing the bark and infusing rich flavor.
Common mistake
Using too much wood or 'dirty' smoke, which imparts a bitter flavor.
- 250°F30 min
Preheat your smoker to 250°F. Add Post Oak wood chunks (for offset smokers) or set your pellet grill to use Post Oak pellets for consistent smoke production.
Why it matters
Maintaining a steady temperature and clean smoke is crucial for even cooking and optimal smoke flavor absorption.
Common mistake
Fluctuating temperatures and dirty smoke (thick white smoke), which can give meat a bitter flavor.
- 250°F6h
Place the seasoned brisket directly on the grates, fat side up or towards the main heat source. Insert your probe into the thickest part of the flat, avoiding large pockets of fat. Allow the brisket to smoke undisturbed for 6 hours, or until a dark, mahogany bark has formed.
Why it matters
This initial 'naked' smoke period is essential for developing a deep, dark, and flavorful bark by allowing the rub to dry and adhere.
Common mistake
Peeking too often or spritzing early disrupts bark formation and extends cook time.
- 250°F30 min
Fill your pellet grill hopper with Post Oak pellets or load your offset smoker with Post Oak wood. Preheat your smoker to the target temperature. Once stable, you are ready to place the brisket.
Why it matters
A stable temperature and clean blue smoke are crucial for proper smoke absorption and avoiding acrid flavors. Post Oak is the traditional choice for brisket.
Common mistake
Putting the meat on before the smoker reaches a stable temperature, leading to inconsistent cooking and poor smoke absorption initially.
- 250°F6h
Place the brisket directly on the grates, fat side down (if your heat source is from below). Insert a temperature probe into the thickest part of the flat, avoiding large pockets of fat. Close the lid and maintain 250°F.
Why it matters
The first 6 hours are critical for smoke penetration and bark development. Keeping it 'naked' allows maximum smoke exposure.
Common mistake
Opening the lid too frequently, which causes temperature drops and prolongs cooking time.
- 250°F6h
Place the brisket fat-side down on the grates. Insert a temperature probe into the thickest part of the flat. Smoke without disturbance until an internal temperature of about 165-170°F is reached or a deep, dark bark has formed, typically around 6 hours.
Why it matters
This 'naked' phase is critical for bark formation. Smoking fat-side down provides a layer of protection from direct heat, preventing the bottom of the brisket from drying out.
Common mistake
Opening the smoker too frequently, which causes temperature fluctuations and extends cook time.
- 250°F6h
Place the brisket directly on the grates, fat-side up. Close the lid and maintain the smoker temperature. Do not open for the first 4 hours to allow smoke to adhere. After 4 hours, begin spritzing every hour with apple cider vinegar to keep the surface moist.
Why it matters
The initial 'naked' smoke phase is vital for building a deep, flavorful bark. Keeping the smoker closed early maximizes smoke ring development.
Common mistake
Opening the smoker too frequently, which extends cook time and disrupts smoke adherence, or not spritzing, leading to a dry bark.
- 250°F4h
Once the bark is set, prepare a 'foil boat'. Lay out several sheets of heavy-duty foil, overlapping them to create a large enough piece to wrap around the bottom and sides of the brisket, leaving the top fully exposed. Place the brisket into the foil boat. Pour the beef tallow over the brisket, allowing it to pool in the bottom of the foil boat. Return the brisket in its foil boat to the smoker.
Why it matters
The foil boat protects the bottom and sides from drying out while allowing the top bark to continue soaking up smoke and firming up. The tallow adds moisture and richness.
Common mistake
Improperly forming the foil boat can lead to leaks, drying out the bottom, or not enough exposure for the top bark.
- 250°F4h
Continue cooking in the foil boat until the internal temperature reaches between 200-205°F (93-96°C) and the brisket is 'probe tender' – when an instant-read thermometer slides into the meat with very little resistance, like butter. This usually takes another 4-6 hours.
Why it matters
Doneness is determined by tenderness, not solely by temperature. Probe tenderness indicates collagen breakdown for a juicy, tender brisket.
Common mistake
Pulling the brisket solely based on temperature can result in tough meat if the collagen hasn't fully rendered.
- 250°F3h
After 6 hours, or when the internal temperature reaches around 160-170°F and a good bark has formed, create a 'foil boat' by folding up the edges of heavy-duty aluminum foil around the brisket, leaving the top exposed. Mix apple cider vinegar and water for a spritz. Spritz the exposed top surface lightly.
Why it matters
The foil boat protects the bottom and sides from drying out while allowing the top bark to continue developing and receiving smoke. Spritzing adds moisture and can aid in bark setting.
Common mistake
Wrapping the entire brisket too early, which can soften the bark and inhibit further smoke penetration.
- 10 min
Once the bark is set, remove the brisket. Form a 'foil boat' by making a cradle of heavy-duty aluminum foil around the brisket, leaving the top exposed. Pour the water and apple cider vinegar mixture into the bottom of the foil boat.
Why it matters
The foil boat protects the bottom and sides from drying out while allowing the top bark to continue developing and receiving smoke. The liquid helps create a moist cooking environment.
Common mistake
Wrapping the entire brisket in foil and losing all smoke contact.
- 2h
Once probe tender, carefully remove the brisket from the smoker, keeping it in its foil boat. Loosely tent the entire brisket with another piece of foil, then wrap it in a few towels. Place it in an insulated cooler (without ice) for a minimum of 2 hours, and up to 4 hours.
Why it matters
Resting allows the muscle fibers to relax and reabsorb juices, ensuring a moister and more tender final product. It also allows carryover cooking to finish the rendering process.
Common mistake
Cutting into the brisket too early will cause all the accumulated juices to run out, resulting in dry meat.
- 250°F4h
Return the brisket in its foil boat to the smoker, fat-side down. Continue to cook until the brisket is probe-tender, typically between 200-205°F internal temperature. The probe should slide in with very little resistance, like warm butter.
Why it matters
Tenderness is more important than a specific temperature. The foil boat helps render the fat and moisten the meat during this phase.
Common mistake
Cooking to a specific temperature without checking for tenderness, resulting in either tough or overcooked brisket.
- 250°F3h
Continue cooking in the foil boat until the brisket reaches an internal temperature of 200-205°F and is probe-tender. 'Probe-tender' means a thermometer or skewer slides in with very little resistance, like soft butter. This may take 3-6 more hours, depending on the brisket.
Why it matters
Cooking to tenderness, not just temperature, is paramount for brisket. Collagen breakdown happens at these higher temperatures, yielding a tender, juicy product.
Common mistake
Relying solely on temperature and pulling the brisket before it is truly probe-tender, resulting in a tough product.
- 15 min
Remove the brisket from the cooler. Separate the flat and the point. Slice the flat against the grain into pencil-thick slices. For the point, you can cube it for burnt ends or slice it thicker, also against the grain. Serve immediately.
Why it matters
Slicing against the grain ensures maximum tenderness by shortening the muscle fibers. Proper slicing is key to a pleasurable eating experience.
Common mistake
Slicing with the grain results in chewy, tough pieces of meat, regardless of how perfectly it was cooked.
- 4h
Once probe tender, remove the brisket from the smoker, leaving it in the foil boat. Wrap the entire boat tightly in additional foil or butcher paper, then wrap in a towel and place in an insulated cooler or oven (turned off) for a minimum of 2 hours, or ideally 4-6 hours.
Why it matters
Resting allows the meat's juices to redistribute throughout the brisket, resulting in a more tender and juicy final product.
Common mistake
Skipping or shortening the rest period, which results in dry, tough brisket.
- 2h
Once probe-tender, remove the brisket from the smoker. Tightly wrap the entire foil boat in another layer of foil, then wrap it in a towel. Place it in a cooler for a minimum of 2 hours, and up to 4 hours.
Why it matters
Resting allows the meat's juices to redistribute throughout the brisket, resulting in a more tender and juicy final product. Skipping this step often leads to dry, tough meat.
Common mistake
Not resting the brisket long enough, or not resting it at all.
Sauce It
Cooks & Reviews
Guild members can rate this recipe, log their cooks and share photos.
Sign in to continueMember reviews
No reviews yet — be the first to rate this cook.
Ask the Pitmaster about this recipe
Substitutions, scaling, technique, troubleshooting — get answers grounded in this cook.
Sign in to try the AI Pitmaster on Simple Foil-Boat Brisket. New members get 3 free questions.
Sign in to tryComments(0)
Loading comments…