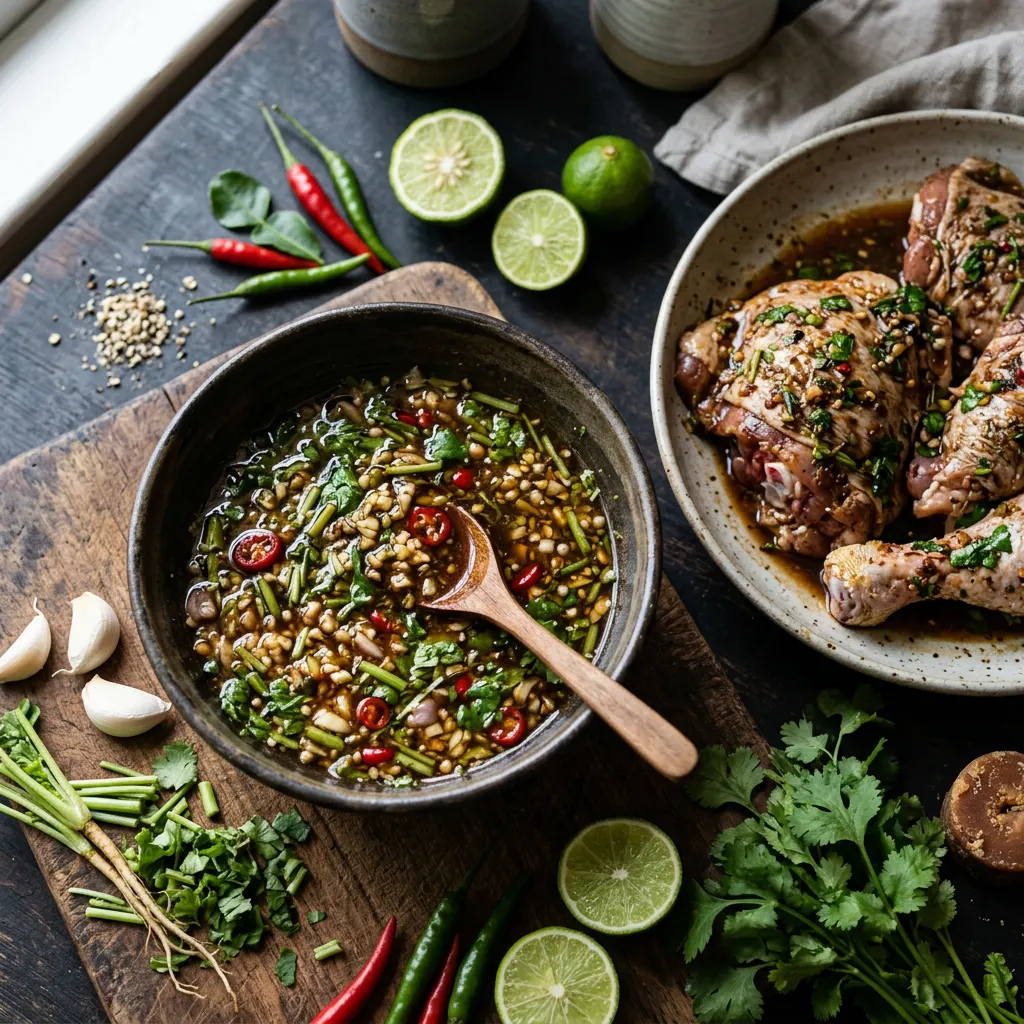
Thai Gai Yang
Street-cart chicken that eats like restaurant food. Loads of white pepper, garlic, and cilantro root. Best on chicken, especially bone-in thighs.
Cook Mode
One step at a time, big text, timers, and your screen stays awake. 0/12 steps done.
Ingredients
Tap to tick off · 0/22 gathered
Method
Blend all ingredients into a rough paste. If you have cilantro roots, use them — the flavor is deeper than stems.
- 15 min
In a mortar and pestle, combine the cilantro roots (or stems), garlic cloves, and white peppercorns. Pound into a fine paste. If you don't have a mortar and pestle, mince finely and mash together with the flat side of a knife.
Why it matters
Pounding releases the essential oils and flavors more effectively than just mincing, creating a robust aromatic paste.
Common mistake
Using a food processor for this step will make it too watery; a mortar and pestle or hand-mincing is key for the right texture.
Coat the chicken and marinate 3 to 12 hours. That much white pepper looks wrong and tastes exactly right.
- 5 min
In a large bowl, whisk together the fish sauce, palm sugar, dark soy sauce, coconut milk, and lime juice. Add the prepared paste and mix thoroughly until the sugar is dissolved.
Why it matters
Properly dissolving the sugar ensures even sweetness throughout the chicken and prevents scorching during cooking.
Common mistake
Not fully dissolving the sugar can lead to an inconsistent flavor profile and sticky spots on the chicken.
- 4h
Add the chicken thighs to the marinade, ensuring they are fully coated. Cover the bowl and refrigerate for at least 4 hours, or preferably overnight.
Why it matters
Longer marination allows the complex flavors to penetrate deep into the meat, tenderizing and flavoring it from within.
Common mistake
Short marination times result in a less flavorful chicken. Don't rush this step for maximum flavor.
- 300°F20 min
Remove chicken from the fridge 30 minutes before smoking. Set up your pellet grill or smoker for indirect heat at a target temperature of 300°F (149°C). Use a mild fruit wood like apple or cherry.
Why it matters
Bringing the chicken closer to room temperature before smoking promotes more even cooking.
Common mistake
Placing cold chicken directly onto the smoker, which can prolong cooking time and dry out the exterior.
- 300°F20 min
Preheat your smoker or pellet grill to 300°F. If using a pellet grill, use a fruit wood like apple or cherry for a mild, complementary smoke.
Why it matters
A slightly higher smoking temperature helps crisp the skin while still imparting good smoke flavor without drying out the chicken.
Common mistake
Starting with too high a temperature can burn the marinade before the chicken is cooked through; too low, and the skin won't crisp.
- 300°F1h 45m
Remove chicken from the marinade, letting excess drip off (do not wipe clean). Place chicken skin-side up directly on the grates of your preheated smoker. Close the lid and smoke until the internal temperature reaches 175°F in the thickest part of the thigh, about 1.5 to 2 hours.
Why it matters
Cooking to 175°F for thighs ensures the dark meat is tender and juicy without being tough, as it has more connective tissue than breast meat.
Common mistake
Undercooking chicken thighs will result in tough, rubbery meat. Overcooking can dry them out, but thighs are more forgiving than breasts.
- 375°F15 min
If the skin isn't as crispy as you'd like, increase the smoker temperature to 375-400°F for the last 10-15 minutes, or transfer to a hot grill until desired crispiness is achieved. Monitor closely to prevent burning.
Why it matters
A higher finishing temperature helps render remaining fat and create that desirable crispy skin, adding texture to the dish.
Common mistake
Forgetting to crisp the skin can leave it rubbery. Don't be afraid to crank up the heat at the end.
- 15 min
Once the chicken reaches the target internal temperature, remove from the smoker and tent loosely with foil. Let rest for 10-15 minutes.
Why it matters
Resting allows the juices to redistribute throughout the meat, resulting in moister, more flavorful chicken.
Common mistake
Cutting into the chicken immediately after cooking will cause all the delicious juices to run out, leaving you with dry meat.
Serve the Gai Yang hot with sticky rice, a fresh cucumber salad, or a spicy dipping sauce.
Why it matters
Traditional accompaniments perfectly complement the rich flavors of the chicken.
Common mistake
Not having sticky rice, which is the perfect vehicle for soaking up all the delicious juices.
Serve hot with sticky rice, a fresh cucumber salad, or your favorite Thai dipping sauce. Enjoy!
Why it matters
Presentation and accompaniments truly elevate this street-food style chicken into a memorable meal.
Common mistake
Not having appropriate dipping sauces or sides can diminish the overall experience of this flavorful dish.
Cooks & Reviews
Guild members can rate this recipe, log their cooks and share photos.
Sign in to continueMember reviews
No reviews yet — be the first to rate this cook.
Ask the Pitmaster about this recipe
Substitutions, scaling, technique, troubleshooting — get answers grounded in this cook.
Sign in to try the AI Pitmaster on Thai Gai Yang. New members get 3 free questions.
Sign in to tryComments(0)
Loading comments…