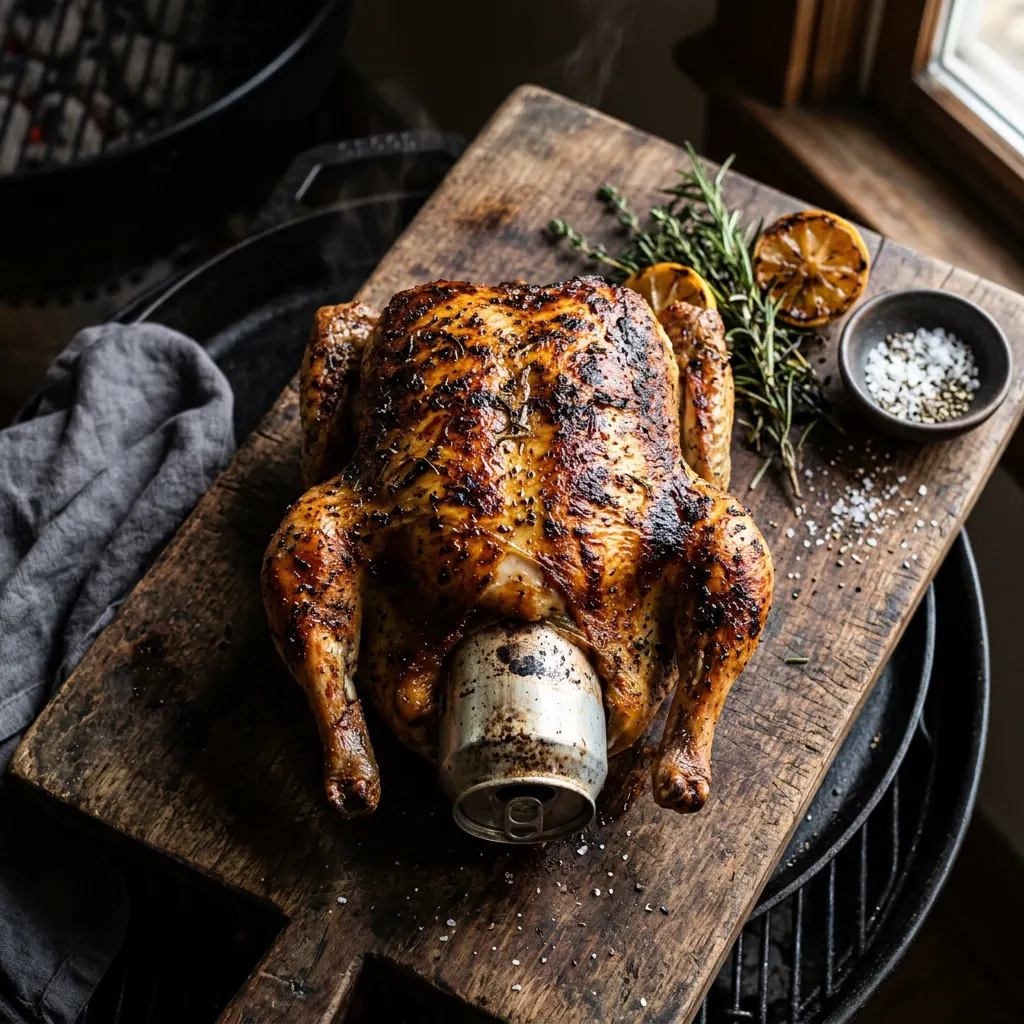
Sweet-Heat Beer-Can Whole Chicken
Published by Shannon Grendahl
The quick answer
- Smoker Temp
- 325°F
- Wood
- Apple
- Pull Temp
- 165°F in the thickest part
- Est. Cook Time
- 2 hr
- Wrap Stage
- No wrap — keep skin exposed
Crispy skin, juicy bird, straightforward backyard cook.
Cook Mode
One step at a time, big text, timers, and your screen stays awake. 0/10 steps done.
Ingredients
Tap to tick off · 0/14 gathered
Method
- 10 min
Remove giblets and neck from the chicken cavity. Pat the chicken thoroughly dry with paper towels inside and out. This is crucial for crispy skin.
Why it matters
Removing moisture from the skin is the single most important step for achieving crispy skin.
Common mistake
Skipping the thorough drying step or not cleaning out the cavity.
- 12h
Pat the chicken completely dry with paper towels. Mix kosher salt, black pepper, garlic powder, and paprika together. Rub this seasoning mixture all over the chicken, including under the skin of the breast if possible. Place the chicken on a wire rack set over a baking sheet and refrigerate uncovered.
Why it matters
Drying the skin is crucial for achieving crispy skin, and the dry brine allows the salt to penetrate the meat, enhancing flavor and moisture retention.
Common mistake
Not drying the chicken thoroughly, leading to rubbery skin.
- 30 min
Remove the chicken from the refrigerator. Leave the beer can about 3/4 full and add a rosemary sprig.
Why it matters
Bringing the chicken closer to room temperature prevents the outside from overcooking before the inside is done. The olive oil helps the rub adhere and promotes crispy skin.
Common mistake
Putting a cold chicken directly on the smoker, which can result in uneven cooking.
- 10 min
Mix smoked paprika, garlic powder, onion powder, black pepper, kosher salt, and thyme. Coat the chicken with olive oil and apply the rub, including beneath the breast and thigh skin, under wings and legs, and lightly inside the cavity.
Why it matters
The oil acts as a binder for the rub and helps distribute the seasoning evenly, contributing to a flavorful crust.
Common mistake
Not seasoning the entire bird, leading to bland spots. Be generous!
- 325°F15 min
Fill your pellet grill with applewood pellets or prepare your offset smoker with applewood chunks for a clean burning fire. Preheat the smoker to 325°F (163°C).
Why it matters
Preheating ensures a stable cooking temperature from the moment the chicken goes in, promoting even cooking and consistent smoke flavor. Applewood provides a mild, sweet smoke that pairs well with chicken.
Common mistake
Adding food before the smoker is at target temperature, leading to undercooking or inconsistent smoke flavor.
- 5 min
Carefully place the seasoned chicken onto a vertical chicken stand or a clean beer can inserted into the cavity. Ensure it's stable. This method allows the chicken to cook evenly from all sides and promotes a crispier skin.
Why it matters
Cooking the chicken upright allows hot air to circulate around the entire bird, rendering fat more effectively and resulting in evenly cooked, crispy skin, especially on the back and underwings.
Common mistake
Not ensuring the chicken is stable on the stand, which can lead to it toppling over during cooking.
- 325°F1h 30m
Place the chicken stand with the chicken directly onto the smoker grates, close the lid, and let it cook. Maintain the smoker temperature at 325°F (163°C).
Why it matters
The higher cooking temperature is key for rendering the fat in the skin, which is essential for achieving that desirable crispy texture while keeping the meat juicy.
Common mistake
Opening the smoker lid too frequently, which causes temperature fluctuations and extends cooking time, potentially drying out the chicken.
- 325°F30 min
After about 75-90 minutes, start checking the internal temperature of the chicken using an instant-read thermometer. Insert the probe into the thickest part of the thigh, avoiding the bone, and then into the breast. Cook until the thickest part of the thigh reaches 175°F (79°C) and the thickest part of the breast reaches 165°F (74°C).
Why it matters
Achieving the correct internal temperature ensures the chicken is safe to eat and perfectly cooked. The difference in target temperatures for thigh and breast accounts for varying fat content and ideal doneness.
Common mistake
Overcooking the breast, which dries it out, or undercooking the thigh, making it tough or unsafe.
- 20 min
Once the chicken reaches the target internal temperatures, carefully remove it from the smoker. Place it on a cutting board and tent loosely with aluminum foil. Allow the chicken to rest for at least 15-20 minutes before carving.
Why it matters
Resting allows the muscle fibers to relax and reabsorb the juices, resulting in a more tender and flavorful chicken. Skipping this step leads to dry meat as all the juices escape when carved.
Common mistake
Carving the chicken immediately after cooking, which causes all the flavorful juices to run out.
- 10 min
After resting, carefully remove the chicken from the stand (if using). Carve the chicken into individual servings, ensuring each piece has some of that delicious crispy skin. Serve immediately.
Why it matters
Proper carving ensures each serving is well-portioned and retains the juiciness developed during the rest. Serving right away ensures the skin is at its crispiest.
Common mistake
Leaving the chicken to sit too long after resting and carving, leading to the skin becoming soggy.
Sauce It
Smoking this for the weekend? Send this recipe to your crew.
Free 12-Page Guide
The Pitmaster Field Manual
Five core habits, meat and wood reference charts, rub formulas, and a printable cook log. Download the free manual and join the Guild email list for new recipes and techniques.
Cooks & Reviews
Guild members can rate this recipe, log their cooks and share photos.
Sign in to continueMember reviews
No reviews yet — be the first to rate this cook.
Ask the Pitmaster about this recipe
Substitutions, scaling, technique, troubleshooting — get answers grounded in this cook.
Sign in to try the AI Pitmaster on Sweet-Heat Beer-Can Whole Chicken. New members get 3 free questions.
Sign in to tryComments(0)
Loading comments…