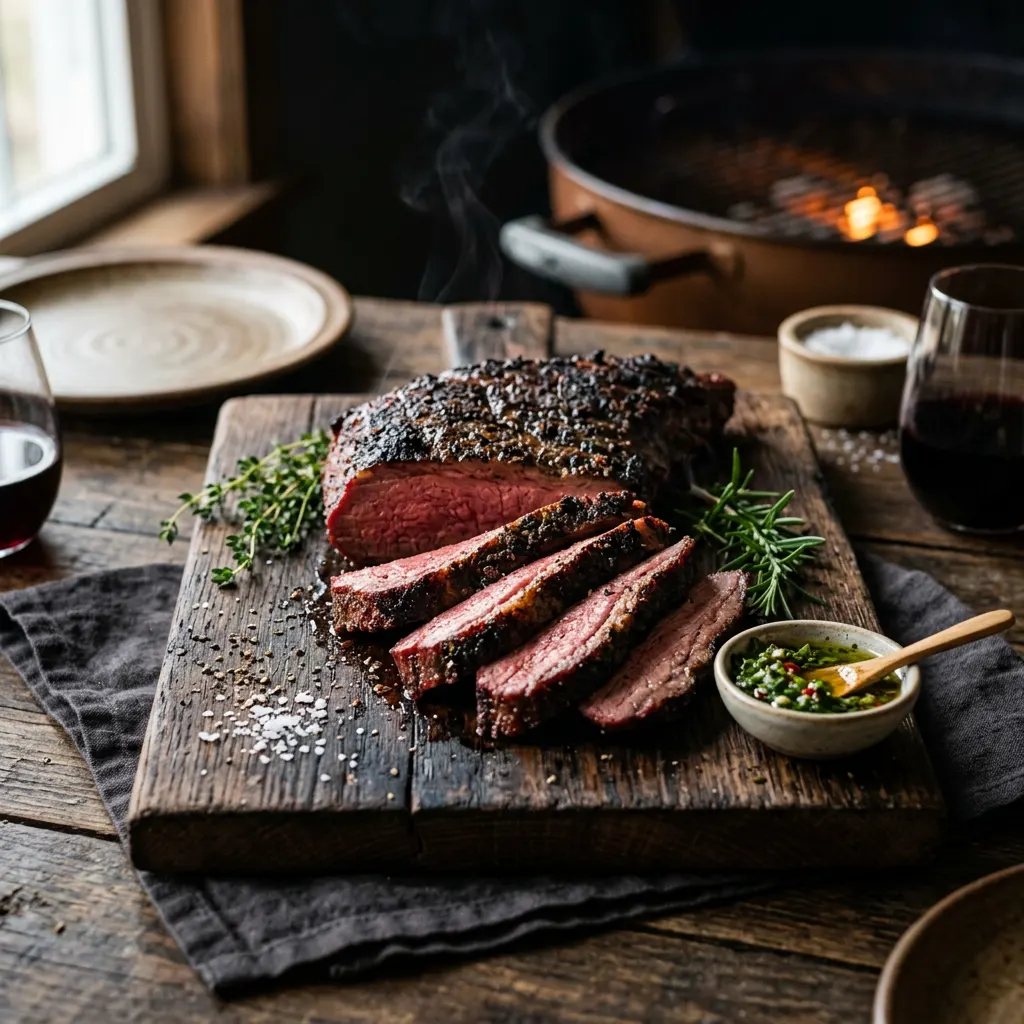
Competition-Style Reverse-Sear Tri-Tip
Smoke to 115°F internal, blast over coals to crust.
Cook Mode
One step at a time, big text, timers, and your screen stays awake. 0/24 steps done.
Ingredients
Tap to tick off · 0/18 gathered
Method
- 15 min
Pat the tri-tip dry with paper towels. Trim off any silverskin or excessively thick fat pockets, leaving about 1/4 inch of fat on one side if present. Drizzle lightly with olive oil and rub evenly over the entire surface. In a small bowl, combine kosher salt, coarse ground black pepper, garlic powder, and onion powder. Liberally apply the rub to all sides of the tri-tip, pressing gently to adhere.
Why it matters
A dry surface ensures better rub adhesion and promotes a crispier bark later. The oil acts as a binder, helping the rub stick and forming a flavorful crust.
Common mistake
Not drying the meat, leading to a steamy surface and a weaker bark.
- 10 min
Pat the tri-tip roast dry with paper towels. Trim any excess silver skin or hard fat from the surface, leaving about 1/4 inch of fat cap if present. Drizzle with olive oil and rub evenly over all surfaces.
Why it matters
A dry surface ensures better bark formation and allows the rub to adhere properly. Trimming silver skin prevents a tough, chewy layer.
Common mistake
Leaving too much silver skin or not drying the meat can lead to a less desirable crust.
- 225°F20 min
Fill your pellet grill hopper with oak pellets or add oak chunks to your offset smoker. Preheat your smoker to a stable temperature of 225°F (107°C).
Why it matters
Achieving a stable smoker temperature before adding the meat is crucial for consistent cooking and smoke penetration. Oak wood provides a robust, classic beefy flavor.
Common mistake
Adding meat before the smoker is fully up to temperature, which can result in inconsistent cooking and off-flavors from incomplete combustion.
- 10 min
Pat the tri-tip dry with paper towels. Trim off any hard fat or silverskin, leaving a thin layer of fat (1/8 inch) on one side if present. Drizzle with olive oil, then generously season all sides with the mixture of kosher salt, coarse ground black pepper, and granulated garlic. Press the seasoning gently into the meat.
Why it matters
Drying the surface aids in bark formation. Trimming ensures tenderness. The oil helps the seasoning adhere evenly, creating a consistent flavor profile.
Common mistake
Not drying the meat, leading to steaming instead of a good bark. Not seasoning all sides evenly.
- 10 min
Pat the tri-tip dry with paper towels. Trim any large, silver skin or excessively thick fat pockets, leaving about 1/4 inch of fat on one side. Mix the kosher salt, black pepper, garlic powder, and onion powder to create a rub. Apply the rub generously and evenly over all surfaces of the tri-tip.
Why it matters
Drying the meat helps the rub adhere better and promotes a better bark. Trimming ensures even cooking and prevents chewy bits. A good rub forms the flavor foundation.
Common mistake
Leaving too much silver skin or not drying the meat sufficiently.
- 225°F1h
Place the seasoned tri-tip directly on the grates in the preheated smoker. Insert a reliable probe thermometer into the thickest part of the meat, avoiding any large fat pockets. Close the lid and smoke until the internal temperature reaches 115°F (46°C).
Why it matters
Smoking at a low temperature allows for maximum smoke absorption and gently brings the internal temperature up, preparing it for the high-heat sear. Pulling at 115°F ensures a perfect medium-rare after the sear and rest.
Common mistake
Overcooking the tri-tip in the smoker, leaving no room for the searing phase to create a crust without going past desired doneness.
- 500°F10 min
Once the tri-tip hits 115°F, remove it from the smoker and set it aside on a cutting board or wire rack. Immediately increase your pellet grill's temperature to its highest setting (usually 450-500°F) for direct searing, or prepare a very hot charcoal grill.
Why it matters
Removing the tri-tip allows you to quickly transition to the searing stage without overcooking. A screaming hot grill is essential for developing a crispy, flavorful crust rapidly.
Common mistake
Not getting the searing surface hot enough, resulting in a gray, steamed exterior instead of a dark, flavorful crust.
- 225°F15 min
Pre-heat your pellet grill or smoker to 225°F. Add your oak wood chunks to the firebox (if using a charcoal smoker) or ensure your pellet grill has oak pellets loaded.
Why it matters
Achieving a stable low temperature is crucial for the 'reverse-sear' method, allowing the internal temperature to rise slowly and evenly, maximizing smoke penetration. Oak wood provides a classic, robust beef flavor.
Common mistake
Not allowing the smoker to come to temperature and stabilize, leading to inconsistent cooking.
- 500°F10 min
Once your grill is blazing hot, place the tri-tip directly over the high heat. Sear for 2-3 minutes per side, rotating frequently to get an even crust. Watch closely for flare-ups. Continue searing until a beautiful, dark brown crust forms and the internal temperature reaches 125-130°F (52-54°C) for medium-rare.
Why it matters
This high-heat sear creates the 'Maillard reaction,' which develops complex flavors and a satisfyingly crunchy texture on the exterior, while the interior remains juicy and tender.
Common mistake
Over-searing or under-searing. Too long and it burns or overcooks; too short and you miss out on flavor and texture.
- 5 min
Combine coarse salt, coarse black pepper, and garlic powder in a small bowl. Liberally apply the rub mixture to all sides of the tri-tip, pressing gently to ensure it sticks. Don't be shy!
Why it matters
A generous, even coating of rub is crucial for developing that iconic competition BBQ flavor and bark.
Common mistake
Applying too little rub, leading to a bland exterior, or not pressing it in, causing it to fall off during cooking.
- 225°F20 min
Set your smoker or pellet grill to 225°F. Add oak wood chunks or pellets to the firebox/hopper as per your smoker's instructions. Ensure the smoker maintains a consistent temperature.
Why it matters
Preheating creates a stable smoking environment, allowing the tri-tip to absorb smoke evenly from the start without temperature fluctuations.
Common mistake
Putting the meat on before the smoker is fully up to temperature, leading to less consistent smoke penetration.
- 15 min
Remove the tri-tip from the grill and place it on a clean cutting board, loosely tented with foil. Allow it to rest for at least 10-15 minutes.
Why it matters
Resting allows the muscle fibers to relax and reabsorb the juices that have migrated to the center during cooking. This results in a much juicier and more tender final product.
Common mistake
Slicing the meat immediately after cooking, causing all the delicious juices to run out onto the cutting board.
- 5 min
After resting, identify the grain of the tri-tip. It often changes direction in the middle of the roast. Slice against the grain into thin, 1/4-inch slices. Serve immediately.
Why it matters
Slicing against the grain shortens the muscle fibers, making the meat much more tender and enjoyable to chew. Tri-tip has a unique grain structure that requires careful observation.
Common mistake
Slicing with the grain, which results in tough, chewy slices despite proper cooking.
- 225°F20 min
Preheat your smoker or pellet grill to a stable 225°F (107°C). Add your oak wood chunks or ensure your pellet hopper is filled with oak pellets. Place a water pan in the smoker if available, for added moisture.
Why it matters
Maintaining a consistent low temperature and using quality wood is key for optimal smoke penetration and a tender, juicy interior.
Common mistake
Fluctuating temperatures or using too much wood can result in bitter smoke flavor.
- 225°F1h
Place the seasoned tri-tip directly on the grates of your pre-heated smoker. Insert a reliable probe thermometer into the thickest part of the roast, avoiding bone or large fat pockets. Smoke until the internal temperature reaches 115°F.
Why it matters
Smoking at a low temperature allows for deep smoke penetration and a more tender, evenly cooked interior before the high-heat sear. Pulling at 115°F leaves room for carryover cooking and the searing phase.
Common mistake
Smoking past 115°F, which will result in an overcooked interior after searing. Not using a reliable probe thermometer.
- 115°F1h
Place the seasoned tri-tip directly on the smoker grates. Insert a probe thermometer into the thickest part of the meat, avoiding any bone or large fat pockets. Smoke until the internal temperature reaches 115°F.
Why it matters
Low and slow smoking at 225°F infuses the meat with a rich, oaky flavor while gradually bringing it to a near-perfect medium-rare without overcooking the edges.
Common mistake
Opening the smoker lid too frequently, which causes temperature drops and prolongs cooking time.
- 225°F1h
Place the seasoned tri-tip directly on the grates of the preheated smoker. Insert a reliable probe thermometer into the thickest part of the meat, avoiding any fat or bone. Close the lid and let it smoke.
Why it matters
Smoking at a low temperature allows the collagen to slowly break down and the smoke flavor to infuse deeply without overcooking the meat.
Common mistake
Opening the smoker lid too often, which causes temperature drops and prolongs cook time.
- 115°F
Continue smoking until the internal temperature of the tri-tip reaches 115°F (46°C). This is your target for the first phase of the reverse sear.
Why it matters
Hitting 115°F precisely ensures the meat is warm enough for the sear but still cool enough to prevent overcooking to medium-rare.
Common mistake
Not using a reliable thermometer, which can lead to overcooked or undercooked meat.
- 135°F10 min
Once the tri-tip reaches 115°F internal, remove it immediately from the smoker. Lightly brush the tri-tip with high-smoke point oil. Place it directly over your preheated searing station. Sear for 2-3 minutes per side, rotating frequently, until a deep, dark crust (Maillard reaction) is formed and the internal temperature reaches 130-135°F for medium-rare.
Why it matters
The high heat creates a flavorful, crispy crust (Maillard reaction) that contrasts beautifully with the tender, smoky interior, while only minimally raising the internal temperature to achieve desired doneness.
Common mistake
Over-searing or not rotating enough, leading to burnt spots or an overcooked interior.
- 15 min
Remove the tri-tip from the searing station and place it on a cutting board. Tent loosely with aluminum foil. Let it rest for at least 10-15 minutes.
Why it matters
Resting allows the juices within the meat to redistribute, resulting in a more tender and flavorful slice. Skipping this step leads to dry meat as juices escape when cut.
Common mistake
Cutting into the meat immediately after cooking, causing all the delicious juices to run out.
- 15 min
Remove the tri-tip from the grill immediately after searing. Place it on a clean cutting board and tent loosely with foil. Let it rest for 10-15 minutes.
Why it matters
Resting allows the juices to redistribute throughout the meat, resulting in a more tender and moist finished product. Skipping this step leads to dry meat as juices will run out when sliced.
Common mistake
Slicing the meat too soon after cooking, losing valuable juices and tenderness.
- 10 min
Once the tri-tip reaches 115°F, remove it from the smoker. Immediately transfer it to a preheated grill or cast-iron skillet (over very high heat) for searing. Sear for 2-3 minutes per side, rotating frequently, until a dark, crusty bark forms. If desired, add butter and rosemary to the pan during the last minute of searing.
Why it matters
The high-heat sear creates the Maillard reaction, developing a flavorful, crispy crust that contrasts beautifully with the tender, smoky interior.
Common mistake
Not getting the searing surface hot enough, resulting in a steamed rather than seared crust.
- 5 min
After resting, slice the tri-tip against the grain. Tri-tip has two distinct grain directions, so you'll need to cut it into two sections first, then slice each section against its respective grain. Serve immediately.
Why it matters
Slicing against the grain shortens the muscle fibers, making the meat much more tender and enjoyable to eat. Incorrect slicing can make even perfectly cooked meat seem tough.
Common mistake
Not identifying and slicing against the grain, resulting in chewy meat.
- 15 min
Once seared to your liking (internal temp should be around 125-130°F for medium-rare), immediately remove the tri-tip from the heat. Place it on a cutting board, tent loosely with foil, and let it rest.
Why it matters
Resting allows the juices to redistribute throughout the meat, resulting in a much juicier and more tender slice.
Common mistake
Cutting into the meat too soon, causing all the delicious juices to run out.
Sauce It
Cooks & Reviews
Guild members can rate this recipe, log their cooks and share photos.
Sign in to continueMember reviews
No reviews yet — be the first to rate this cook.
Ask the Pitmaster about this recipe
Substitutions, scaling, technique, troubleshooting — get answers grounded in this cook.
Sign in to try the AI Pitmaster on Competition-Style Reverse-Sear Tri-Tip. New members get 3 free questions.
Sign in to tryComments(0)
Loading comments…