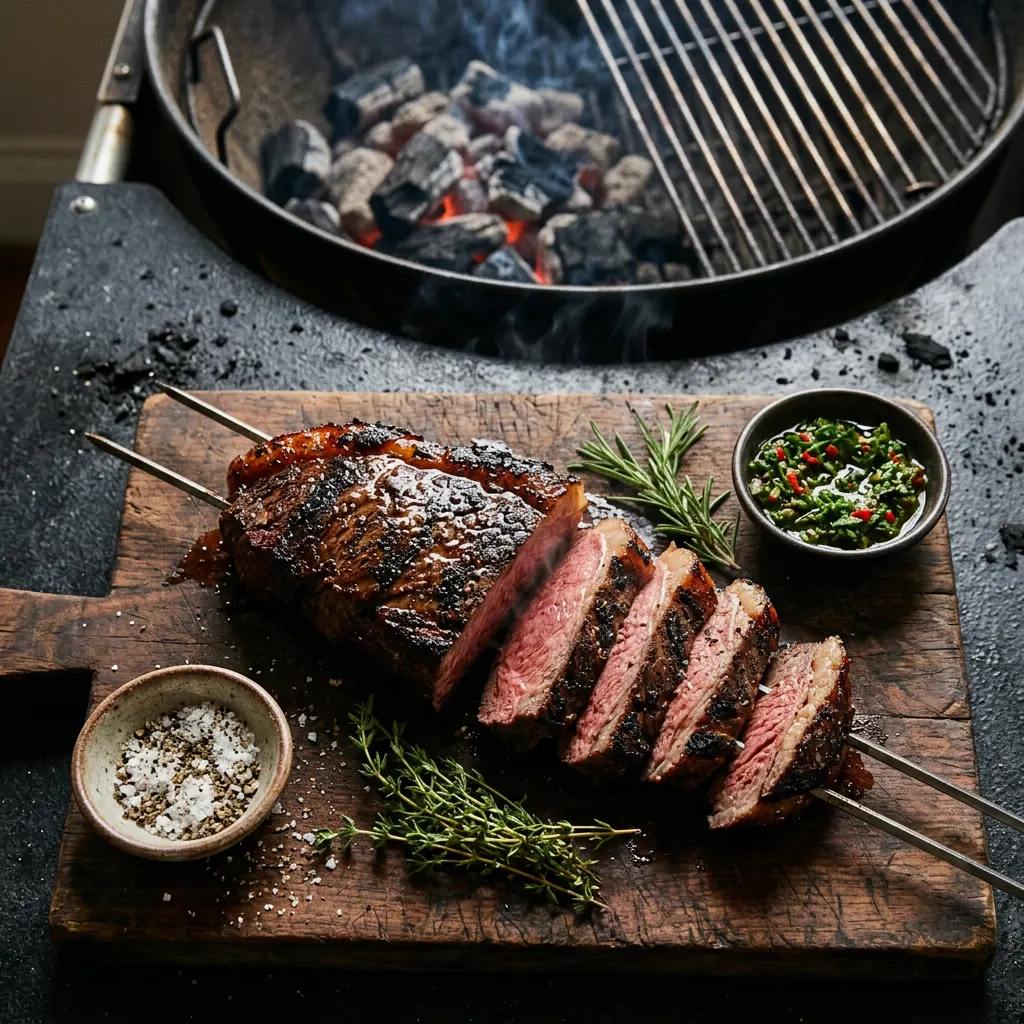
Apple-Smoked Picanha on the Kettle
Skewered top sirloin cap, hot coals, Argentinian style.
Cook Mode
One step at a time, big text, timers, and your screen stays awake. 0/30 steps done.
Ingredients
Tap to tick off · 0/29 gathered
Method
- 15 min
Pat the picanha dry with paper towels. Score the fat cap in a crosshatch pattern, cutting only into the fat, not the meat. Cut the picanha against the grain into 3-4 steaks, about 1.5 to 2 inches thick. Season generously with a blend of coarse sea salt, black pepper, and garlic powder on all sides, focusing on the fat cap.
Why it matters
Scoring the fat allows it to render more effectively and creates delicious crispy texture, while cutting against the grain ensures tender slices after cooking. Patting dry helps the seasoning adhere and promotes a better crust.
Common mistake
Cutting too deep into the meat when scoring, which can cause the muscle to separate and dry out. Not seasoning generously enough, as picanha can handle a lot of flavor.
- 15 min
Score the fat cap of the picanha in a crosshatch pattern, being careful not to cut into the meat. Cut the entire roast AGAINST the grain into 1 to 1.5-inch thick 'steaks'. Each piece should still have the fat cap attached. Fold each steak into a 'C' shape, with the fat cap on the outside curve. Thread 2-3 of these folded pieces onto each metal skewer, ensuring the fat cap is facing out and the meat is tightly packed.
Why it matters
Scoring the fat cap helps it render more efficiently and creates a crispier crust. Cutting against the grain ensures tender slices when serving, and folding allows for even cooking and a beautiful presentation.
Common mistake
Cutting with the grain will result in tough, chewy meat. Not scoring the fat can lead to uneven rendering and a less crispy texture.
- 5 min
Fold each picanha steak into a 'C' shape, with the fat cap on the outside curve. Thread 1-2 skewers through the folded steaks, ensuring they are securely held and the fat cap is facing upwards. Aim for 2-3 pieces per skewer depending on size.
Why it matters
Folding and skewering into a 'C' shape mimics the traditional Brazilian churrasco style, allowing the fat to render down and baste the meat below while creating a beautiful presentation.
Common mistake
Not skewering tightly enough, causing the meat to flop or rotate on the skewer. Overcrowding the skewers, which can lead to uneven cooking.
- 10 min
Pat the picanha dry with paper towels. Trim any silver skin from the meat side, but leave the fat cap intact. Score the fat cap in a diamond pattern, being careful not to cut into the meat itself. Cut the picanha against the grain into 3-4 thick steaks (about 2 inches thick).
Why it matters
Scoring the fat cap helps render it more efficiently, creating a crispy crust and allowing seasoning to penetrate. Cutting against the grain before skewering ensures tender slices.
Common mistake
Cutting too deep into the meat when scoring, which can cause the fat to separate and dry out the meat.
- 450°F20 min
Fill a chimney starter with lump charcoal and light it. Once the coals are fully lit and covered in ash (about 15-20 minutes), carefully dump them into your kettle grill, distributing them evenly on one side for direct high heat. Place 1-2 small oak wood chunks directly on the hot coals. Place the cooking grate over the coals, close the lid, and open all vents fully.
Why it matters
A high, direct heat zone is crucial for achieving a beautiful sear and crisp fat cap on the picanha quickly, preventing the inside from overcooking. Oak wood adds a classic, strong beefy smoke flavor.
Common mistake
Not letting the coals get fully lit, which results in uneven heat and acrid smoke. Not opening vents fully, which starves the fire of oxygen and prevents high temperatures.
- 5 min
Liberally season all sides of the picanha steaks with coarse sea salt and freshly cracked black pepper. Fold each steak into a 'C' shape, with the fat cap on the outside curve. Thread two long metal skewers through the folded steaks, ensuring they are securely held.
Why it matters
The generous application of coarse salt forms a flavorful crust. Skewering in a 'C' shape maximizes fat-rendering efficiency and ensures even cooking over high heat.
Common mistake
Not enough salt, leading to a bland crust, or not securely skewering, causing meat to spin on the grill.
- 450°F15 min
Once the grill reaches 450°F, place the skewered picanha directly over the hot coals, fat cap down, for 3-4 minutes to sear and crisp. Flip and sear on the meat side for 3-4 minutes, then sear the other two sides for 2-3 minutes each, ensuring all surfaces get good color.
Why it matters
High-temperature searing creates the coveted Maillard reaction, developing deep, complex flavors and a beautiful crust on the exterior, especially on the fat cap.
Common mistake
Not allowing the grill to get hot enough before adding the meat, which leads to steaming instead of searing. Over-searing one side, resulting in an uneven cook.
- 5 min
Liberally season all sides of the skewered picanha with coarse sea salt. Don't be shy, especially on the fat cap.
Why it matters
The coarse salt is crucial for developing that incredible, crunchy, salty crust (known as 'bark' in BBQ terms) that is characteristic of expertly cooked picanha. It also enhances the beef's natural flavor.
Common mistake
Under-salting will leave the meat bland and the fat cap less appealing. Using fine salt might create too salty a crust too quickly.
- 15 min
Fill a chimney starter with lump charcoal and light it from the bottom. Let the coals burn until they are fully ignited and glowing orange, with a light layer of ash.
Why it matters
Getting the coals to a uniform, hot temperature ensures consistent direct heat for searing and a proper crust.
Common mistake
Starting to cook before coals are fully ignited, resulting in uneven heat and dirty smoke.
- 400°F10 min
Move the skewers to the indirect heat side of the grill (away from the coals), close the lid, and continue cooking. Monitor the internal temperature closely using an instant-read thermometer. For medium-rare, cook until the internal temperature reaches 125°F-130°F. For medium, target 130°F-135°F.
Why it matters
Finishing on indirect heat allows the internal temperature to rise gently without burning the exterior, ensuring an even cook from edge to center for a perfectly done steak.
Common mistake
Not using an instant-read thermometer, leading to guesswork and potentially overcooked or undercooked meat. Overcooking the picanha, which can make it tough.
- 5 min
Generously season all sides of the skewered picanha with coarse kosher salt and black pepper. Pay special attention to the fat cap and ensure a good, even coating.
Why it matters
A generous application of coarse salt is crucial for developing that flavorful, crispy crust and seasoning the meat deeply. Pepper adds a complementary bite.
Common mistake
Not seasoning enough. Picanha can handle a good amount of salt, especially on the fat cap, which will render and distribute flavor.
- 15 min
Once the desired internal temperature is reached, remove the picanha skewers from the grill. Transfer them to a clean cutting board, tent loosely with foil, and let rest for at least 10-15 minutes.
Why it matters
Resting allows the muscle fibers to relax and reabsorb the juices, resulting in a more tender and moist steak. Cutting too soon will cause the flavorful juices to run out.
Common mistake
Cutting into the meat immediately after removing it from the grill, which causes a significant loss of moisture and flavor.
- 5 min
Remove the picanha from the skewers. Slice the picanha against the grain into thin pieces, about 1/4 to 1/2 inch thick. Serve immediately with your favorite sides.
Why it matters
Slicing against the grain shortens the muscle fibers, making the meat much more tender and enjoyable to eat. Thin slices are traditional and maximize the enjoyment of the crust.
Common mistake
Slicing with the grain, which results in tough, chewy pieces of meat.
- 450°F20 min
Fill a chimney starter with charcoal briquettes and light them. Once fully lit and ashed over (about 15-20 minutes), carefully pour the hot coals onto one side of your kettle grill, creating a two-zone fire (direct and indirect heat zones). Place the oak wood chunks directly on top of the lit charcoal.
Why it matters
A two-zone fire is essential for searing the picanha quickly for crust development and then moving it to indirect heat if needed. The oak wood adds a subtle, complementary smoky flavor.
Common mistake
Not waiting for the coals to be fully lit and ashed over, which can lead to off-flavors and inconsistent heat. Not establishing distinct direct and indirect zones.
- 450°F20 min
Fill your chimney starter with charcoal briquettes. Place unlit charcoal in your kettle grill on one side to create a two-zone fire. Light the charcoal in the chimney starter. Once fully lit (coals are mostly ash-covered and glowing red), carefully pour them onto the unlit charcoal in the kettle grill, forming a hot, direct heat zone.
Why it matters
A two-zone fire is crucial for grilling picanha, allowing you to sear over direct high heat and then move to indirect heat if needed to finish cooking without burning, although with picanha on skewers, direct is often king.
Common mistake
Not waiting for the coals to be fully lit, which results in uneven heat and off-flavors.
- 450°F15 min
Fill a chimney starter to the top with lump charcoal and light it. Once the coals are fully ash-covered and glowing red, carefully pour them onto one side of your kettle grill, creating a two-zone fire (direct heat on one side, indirect on the other). Place your oak wood chunks directly on top of the lit coals. Set the grill grate in place and close the lid, allowing the grill to preheat.
Why it matters
A two-zone fire gives you control: high heat for searing, and a cooler zone for managing flare-ups or finishing. The oak wood adds a subtle, complementary smoke flavor to the beef.
Common mistake
Not letting the charcoal get fully ignited before spreading, leading to uneven heat and smoke.
- 450°F5 min
Once the coals are ready, dump them onto one side of your kettle grill, creating a high-heat direct zone. Place a couple of oak chunks on top of the hot coals for flavor if desired. Ensure your grill grate is clean and in place. You want the grill grate to be very hot.
Why it matters
A clean, hot grate prevents sticking and helps create a strong crust. Concentrating coals to one side allows for direct searing and an indirect zone for resting if needed.
Common mistake
Not preheating the grate sufficiently, which causes the meat to stick and tear.
- 450°F20 min
Fill a chimney starter with charcoal briquettes and light them. Once the coals are fully ash-covered and glowing red (about 15-20 minutes), carefully pour them onto one side of the kettle grill, creating a two-zone fire. Place your oak wood chunks directly on the hot coals if desired.
Why it matters
A two-zone fire (direct and indirect heat) is crucial for high-heat searing followed by controlled cooking. Glowing coals ensure consistent, high heat. Oak provides a classic, robust smoke flavor that complements beef.
Common mistake
Starting to cook before the coals are fully lit, leading to inconsistent heat and off-flavors.
- 450°F25 min
Fill a chimney starter with charcoal and light it. Once the coals are fully lit and glowing red with a layer of ash (about 15-20 minutes), carefully pour them onto one side of your kettle grill to create a two-zone fire (direct and indirect heat). Add 2-3 small oak wood chunks directly onto the hot coals for flavor.
Why it matters
A high-heat two-zone setup is essential for achieving a perfect sear on the picanha while having a cooler zone available for finishing if needed. The oak wood provides a clean, robust smoke flavor that complements beef beautifully.
Common mistake
Not letting the coals get fully lit before spreading them will lead to uneven heat and off-flavors. Too much wood can overpower the meat.
- 450°F3 min
Once the grill reaches 450°F, place the skewered picanha over the direct heat, fat cap down. Sear for 2-3 minutes, rotating as needed until the fat cap is crispy and golden brown, but not burnt. Watch for flare-ups.
Why it matters
Searing the fat cap first renders it down, creating a delicious crispy texture and basting the meat, contributing to the 'beefy' flavor profile.
Common mistake
Burning the fat cap by not watching it closely or searing too long, which imparts a bitter taste.
- 450°F10 min
Once the coals are glowing, add the oak wood chunks directly onto the hot coals. Place the cooking grate on the kettle grill. Allow the grill to preheat with the lid on for 5-10 minutes to reach the target temperature.
Why it matters
Oak wood provides a quintessential beefy smoke flavor that complements picanha. Preheating the grate ensures a good sear and prevents sticking.
Common mistake
Adding wood chunks too early, burning them off before the meat is on, or too late, not getting enough smoke flavor.
- 450°F15 min
Place the skewered picanha directly over the hot coals (direct heat zone) with the fat cap facing upward initially. Close the lid. Cook for 3-4 minutes per side, turning the skewers every few minutes to ensure even cooking and a beautiful crust on all sides. The goal is a medium-rare to medium internal temperature.
Why it matters
The high heat creates a fantastic crust while the fat cap bastes the meat as it renders. Frequent turning ensures an even sear without burning.
Common mistake
Overcooking the picanha; it's best served medium-rare to medium for tenderness and juiciness.
- 350°F15 min
After searing all sides, move the picanha skewers to the indirect heat zone. Close the lid and continue cooking, flipping occasionally, until the internal temperature reaches your desired doneness. For medium-rare, target 130-135°F; for medium, 135-140°F. Use an instant-read thermometer inserted into the thickest part of the meat, avoiding the fat.
Why it matters
Finishing on indirect heat allows the meat to cook through gently without burning the exterior, ensuring tenderness and preventing overcooking. Accurate temperature monitoring is key for perfect doneness.
Common mistake
Guessing doneness without a thermometer often leads to overcooked or undercooked meat. Cooking exclusively over direct heat will burn the outside before the inside is done.
- 450°F15 min
Flip the picanha skewers, turning them every 3-5 minutes to ensure even cooking and a good sear on all sides. Continue cooking over direct heat, moving to the indirect side if browning too quickly. Use an instant-read thermometer to check the internal temperature.
Why it matters
Frequent turning promotes even cooking and crust development. Using a thermometer is the only way to accurately hit your desired doneness, preventing over or undercooking.
Common mistake
Not checking internal temperature, resulting in inconsistent doneness, or constantly moving the meat, which prevents a good sear.
- 10 min
Use an instant-read thermometer to check the internal temperature of the picanha in several spots. Remove the skewers when the desired doneness is reached (target 120-125°F for rare/medium-rare). Transfer the picanha to a cutting board and tent loosely with foil.
Why it matters
Resting allows the meat juices to redistribute throughout the muscle fibers, ensuring a more tender and flavorful finished product.
Common mistake
Slicing immediately after cooking, which causes all the flavorful juices to run out, leaving dry meat.
- 15 min
Move the skewers to maintain direct heat and turn them every 3-4 minutes to cook all sides evenly. Continue cooking until the internal temperature reaches your desired doneness (e.g., 125°F-130°F for medium-rare, or 135°F-140°F for medium). Be mindful of flare-ups from the rendering fat; move to the indirect side if necessary.
Why it matters
Even rotation ensures all sides get a good crust and cook uniformly, while moving to indirect heat is crucial for preventing burning and managing the cook.
Common mistake
Overcooking the meat or not rotating, leading to uneven cooking and a tough texture on one side.
Use an instant-read thermometer to check the internal temperature of the picanha. For medium-rare, aim for 125-130°F (it will rise during rest). For medium, aim for 130-135°F. Since this is a quick cook, ensure you probe multiple pieces.
Why it matters
Accurate temperature readings prevent overcooking and guarantee the desired doneness.
Common mistake
Relying on visual cues alone, which can be deceiving with high-heat grilling.
Cook until the internal temperature reaches your preferred doneness: 125-130°F for rare, 130-135°F for medium-rare, 135-140°F for medium. Remove the picanha from the grill once it reaches the lower end of your target range, as it will continue to cook during the rest.
Why it matters
Understanding carryover cooking is crucial. Removing the meat slightly before target temperature ensures it doesn't overcook during the rest period.
Common mistake
Cooking to the exact target temperature on the grill, leading to overcooked meat after resting.
- 2 min
Remove the meat from the skewers. Slice against the grain into individual portions, making sure each slice has some of the delicious fat cap. Serve immediately.
Why it matters
Slicing against the grain ensures maximum tenderness, enhancing the eating experience.
Common mistake
Slicing with the grain, which makes the meat chewier.
- 5 min
Remove the picanha from the skewers. Slice each piece against the grain into 1/4 to 1/2 inch thick slices. Serve immediately with your favorite accompaniments.
Why it matters
Slicing against the grain ensures each bite is tender, as it shortens the muscle fibers. Picanha is best enjoyed fresh off the grill to appreciate its crispy fat and juicy interior.
Common mistake
Slicing with the grain, even after proper cooking and resting, will make the meat tough and stringy.
Cooks & Reviews
Guild members can rate this recipe, log their cooks and share photos.
Sign in to continueMember reviews
No reviews yet — be the first to rate this cook.
Ask the Pitmaster about this recipe
Substitutions, scaling, technique, troubleshooting — get answers grounded in this cook.
Sign in to try the AI Pitmaster on Apple-Smoked Picanha on the Kettle. New members get 3 free questions.
Sign in to tryComments(0)
Loading comments…