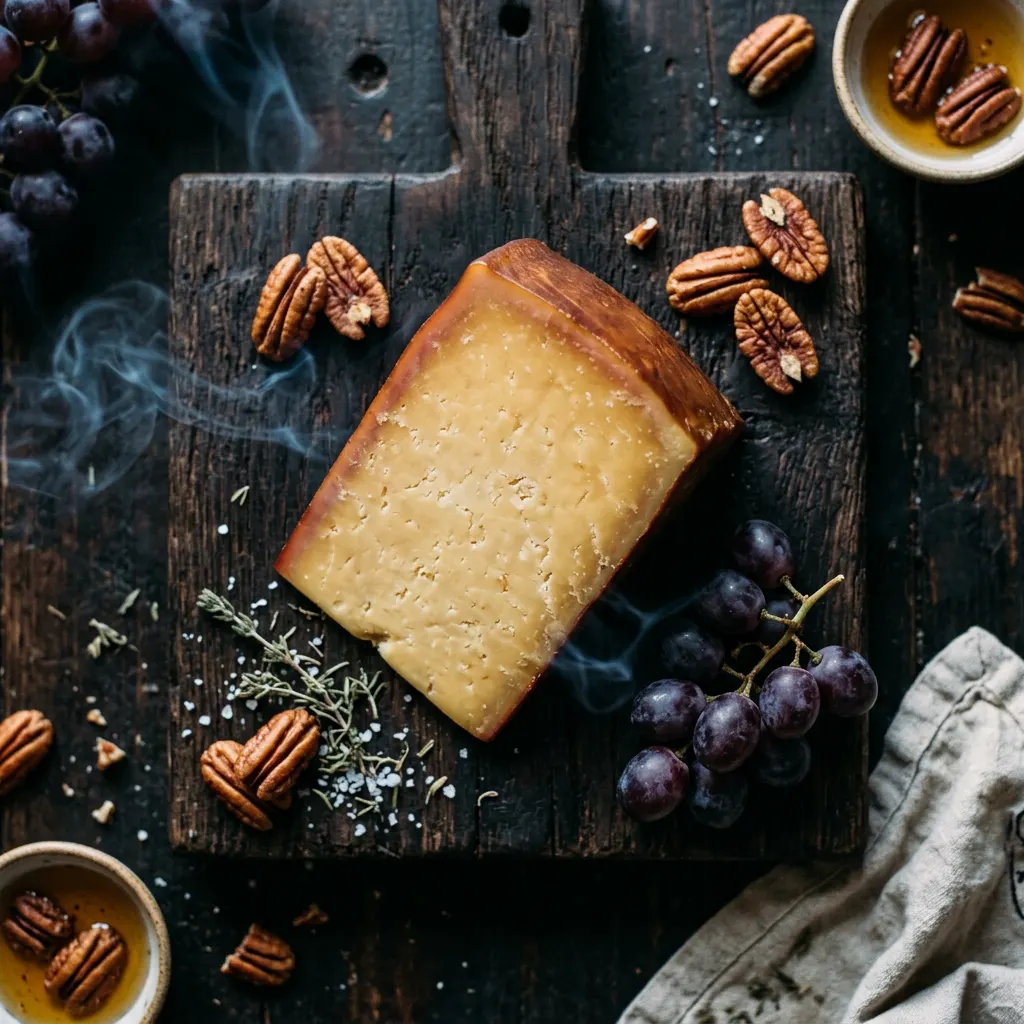
Variation of Hickory-Smoked Cold-Smoked Sharp Cheddar
4 hours of pecan smoke under 85°F, rest 2 weeks vacuum-sealed.
Cook Mode
One step at a time, big text, timers, and your screen stays awake. 0/19 steps done.
Ingredients
Tap to tick off · 0/16 gathered
Method
- 10 min
Unwrap the cheddar cheese blocks. Using paper towels, gently pat the entire surface of each block dry. Place the dry cheese blocks on a wire rack set on top of a baking sheet. Ensure there is good airflow around each block.
Why it matters
A dry surface allows smoke to adhere more effectively and creates a better pellicle, which is crucial for optimal smoke absorption.
Common mistake
Skipping the drying step leads to uneven smoke penetration and a less robust smoky flavor.
- 80°F15 min
Place a cold smoke generator (like a smoke tube or maze) filled with pecan wood pellets into your smoker/pellet grill. Do not turn on the smoker's heating element. The goal is to generate smoke without raising the internal temperature significantly above ambient.
Why it matters
Cold smoking requires maintaining extremely low temperatures to prevent the cheese from melting or sweating, which would ruin its texture and flavor.
Common mistake
Activating the smoker's main heating element and melting the cheese.
- 2h
Place the cheese (on the wire rack/baking sheet) in a refrigerator, uncovered, for at least 60 minutes, or up to 2 hours. This will create a slightly tacky surface (pellicle).
Why it matters
A tacky pellicle acts as a binder for smoke compounds, helping them adhere to the cheese surface for better flavor and color development.
Common mistake
Rushing this step results in poor smoke adherence and a lighter, less developed smoky flavor.
- 4h
Place the cut cheese blocks on a wire rack, ensuring no pieces are touching. Leave them uncovered in the refrigerator for at least 4 hours, or overnight. This allows a 'pellicle' to form.
Why it matters
A dry surface (pellicle) helps smoke adhere better to the cheese, resulting in a more robust and uniform smoky flavor. Excess moisture can lead to bitter, acrid smoke flavor.
Common mistake
Skipping this step leads to a less effective smoke ring and a potentially less intense flavor.
- 5 min
Ignite the pecan pellets in your cold smoke generator according to its instructions. Ensure a steady, thin blue smoke is produced, avoiding thick white smoke, which can impart a bitter flavor.
Why it matters
Thin blue smoke indicates clean combustion and desirable flavor compounds. Thick white smoke often signifies incomplete combustion and can lead to acrid, unpleasant flavors.
Common mistake
Using too many pellets or improper airflow, leading to thick, acrid smoke.
- 80°F30 min
Prepare your smoker for cold smoking. This typically involves using a cold smoke generator (e.g., a 'smoke tube' or 'maze smoker') filled with pecan pellets/chips, placed inside the main cooking chamber. The goal is to generate ample smoke without raising the internal temperature above 85°F. If your ambient temperature is warm, consider adding a pan of ice to the smoker or smoking early in the morning/late evening.
Why it matters
Maintaining a low temperature is paramount to prevent the cheese from melting or becoming oily, while still allowing smoke infusion.
Common mistake
Allowing the smoker temperature to rise too high will melt the cheese and ruin its texture. Always monitor the internal temp with a reliable thermometer.
- 15 min
Fill your cold smoke generator (e.g., A-Maze-N-Smoker) with pecan wood pellets. Place the filled generator inside your smoker, ensuring it has good airflow.
Why it matters
Proper setup of the cold smoke generator is crucial to maintaining low temperatures. We are aiming for smoke, not heat.
Common mistake
Using too many pellets can produce excessive smoke, leading to an overpowering and unpleasant bitter flavor.
- 80°F4h
Place the patted-dry cheese blocks directly on the smoker grates, ensuring good spacing for even smoke exposure. Position your smoker thermometer probe near the cheese to monitor the ambient temperature. Maintain the smoker’s internal temperature below 85°F (ideally around 70-80°F) throughout the smoking process. If ambient temperatures are high, consider placing a pan of ice in the smoker or using a cooler to help regulate the temperature.
Why it matters
Keeping the temperature below 85°F is critical to prevent the cheese from melting and to allow the smoke flavor to infuse without cooking the cheese.
Common mistake
Allowing the smoker temperature to rise too high, causing the cheese to melt and separate.
- 80°F4h
Light the cold smoke generator according to its instructions. Once lit and producing clean, thin blue smoke, place the cheese blocks on the smoker rack, spaced evenly. Ensure the smoker maintains an ambient temperature below 85°F. Use a digital thermometer to monitor.
Why it matters
Keeping the temperature low is paramount to prevent the cheese from melting or sweating, which would ruin its texture and flavor. Cold smoke allows for flavor infusion without cooking.
Common mistake
Allowing the smoker temperature to rise too high will melt the cheese, resulting in a mess and a ruined product. Use ice baths in the smoker if necessary to keep temps down on warm days.
- 80°F4h
Once the smoker is producing a consistent, clean pecan smoke at a temperature below 85°F, place the pellicle-formed cheese blocks (on their wire rack) into the smoker. Ensure good air circulation around each block. Close the smoker and cold smoke for 4 hours.
Why it matters
The low temperature and slow, consistent smoke infusion allow the cheese to absorb the pecan flavor without overcooking or melting, creating a balanced smoky profile.
Common mistake
Over-smoking can lead to an acrid or overly intense flavor. Four hours with pecan produces a pleasant, noticeable smoke.
- 2h
After 4 hours, carefully remove the smoked cheese from the smoker. The cheese will have a slightly darker, golden hue. Let it rest at room temperature for 1-2 hours to allow any surface moisture to dissipate and the initial smoke 'bloom' to mellow.
Why it matters
This initial rest helps stabilize the cheese's temperature and allows the primary smoke gases to dissipate, preventing an overly acrid or chemical taste.
Common mistake
Immediately vacuum sealing without an initial rest can trap undesirable gases, leading to a harsh flavor.
- 1h
Once the 4 hours of smoking are complete, carefully remove the smoked cheese from the smoker. Place the cheese on a clean wire rack and let it air cool at room temperature for at least 1-2 hours. Do not cover the cheese during this initial cooling phase.
Why it matters
This allows the external moisture to dissipate and the immediate surface smoke flavor to set, preparing it for the longer aging process.
Common mistake
Immediately sealing the cheese, which can trap moisture and lead to condensation or uneven flavor distribution.
- 24h
After 4 hours of smoking, remove the cheese from the smoker. Place the smoked cheese blocks on a clean wire rack and refrigerate, uncovered, for at least 24 hours.
Why it matters
This chilling period allows some of the harsh surface smoke compounds to dissipate, preventing the cheese from tasting too acrid. It also sets the smoke flavor.
Common mistake
Immediately vacuum sealing after smoking traps excess harsh smoke, leading to an unbalanced, overly intense smoke flavor.
- 5 min
Once the cheese has rested and is back to room temperature, place each block into a separate vacuum sealer bag. Seal the bags completely, ensuring all air is removed.
Why it matters
Vacuum sealing is critical as it creates an anaerobic environment that prevents mold growth and facilitates the migration of smoke compounds throughout the cheese.
Common mistake
Improper sealing or not vacuum sealing at all will lead to uneven flavor development, potential mold, and a much shorter shelf life.
- 336h
Store the vacuum-sealed smoked cheddar in a refrigerator for a minimum of two weeks. For optimal flavor development, a three to four-week aging period is recommended.
Why it matters
This curing period is where the magic happens. The smoke flavor mellows and permeates fully through the cheese, moving beyond just the surface and developing a complex, integrated taste profile.
Common mistake
Eating the cheese immediately after smoking, resulting in a harsh, acrid smoke flavor concentrated only on the exterior.
- 336h
Store the vacuum-sealed smoked cheddar in the refrigerator for a minimum of 2 weeks. For optimal flavor, a 3-4 week rest is even better.
Why it matters
This extended rest period is essential. It allows the smoke flavor, initially concentrated on the surface, to mellow and distribute throughout the entire block of cheese, resulting in a balanced and complex flavor profile.
Common mistake
Skipping this rest will result in cheese that is overly smoky on the outside and bland on the inside, with a less harmonious flavor.
- 336h
Place the vacuum-sealed smoked cheddar in a refrigerator and age for a minimum of 2 weeks. For a more intense and integrated flavor, consider aging for 3-4 weeks. The longer the rest, the more the smoke flavor will permeate.
Why it matters
The two-week (or longer) rest period allows the smoke flavor to mellow and distribute evenly from the surface into the cheese's interior, creating a complex and balanced taste.
Common mistake
Eating the cheese too soon will result in a strong, superficial smoke flavor that lacks depth and richness.
- 5 min
After the resting period, unseal the cheese, slice thinly, and serve. Enjoy its sharp, nutty, and perfectly balanced smoky flavor.
Why it matters
Proper slicing enhances the eating experience, allowing you to appreciate the texture and flavor development.
Common mistake
Not allowing the cheese to warm up slightly from the fridge can mute some of the nuanced flavors.
- 30 min
After the aging period, remove the cheese from the refrigerator. Open the vacuum seal bag and allow the cheese to breathe for about 15-30 minutes before slicing and serving. This allows the flavors to open up.
Why it matters
Allowing the cheese to warm slightly and breathe after aging brings out its full aromatic and flavor profile.
Common mistake
Serving straight from the fridge can mute the complex flavors that have developed during smoking and aging.
Free Guide
5 Techniques Competition Smokers Use That Home Cooks Don't
Join the Guild email list and we'll send you the free guide — the exact moves that separate backyard cooks from competition pitmasters.
Cooks & Reviews
Guild members can rate this recipe, log their cooks and share photos.
Sign in to continueMember reviews
No reviews yet — be the first to rate this cook.
Ask the Pitmaster about this recipe
Substitutions, scaling, technique, troubleshooting — get answers grounded in this cook.
Sign in to try the AI Pitmaster on Variation of Hickory-Smoked Cold-Smoked Sharp Cheddar. New members get 3 free questions.
Sign in to tryComments(0)
Loading comments…