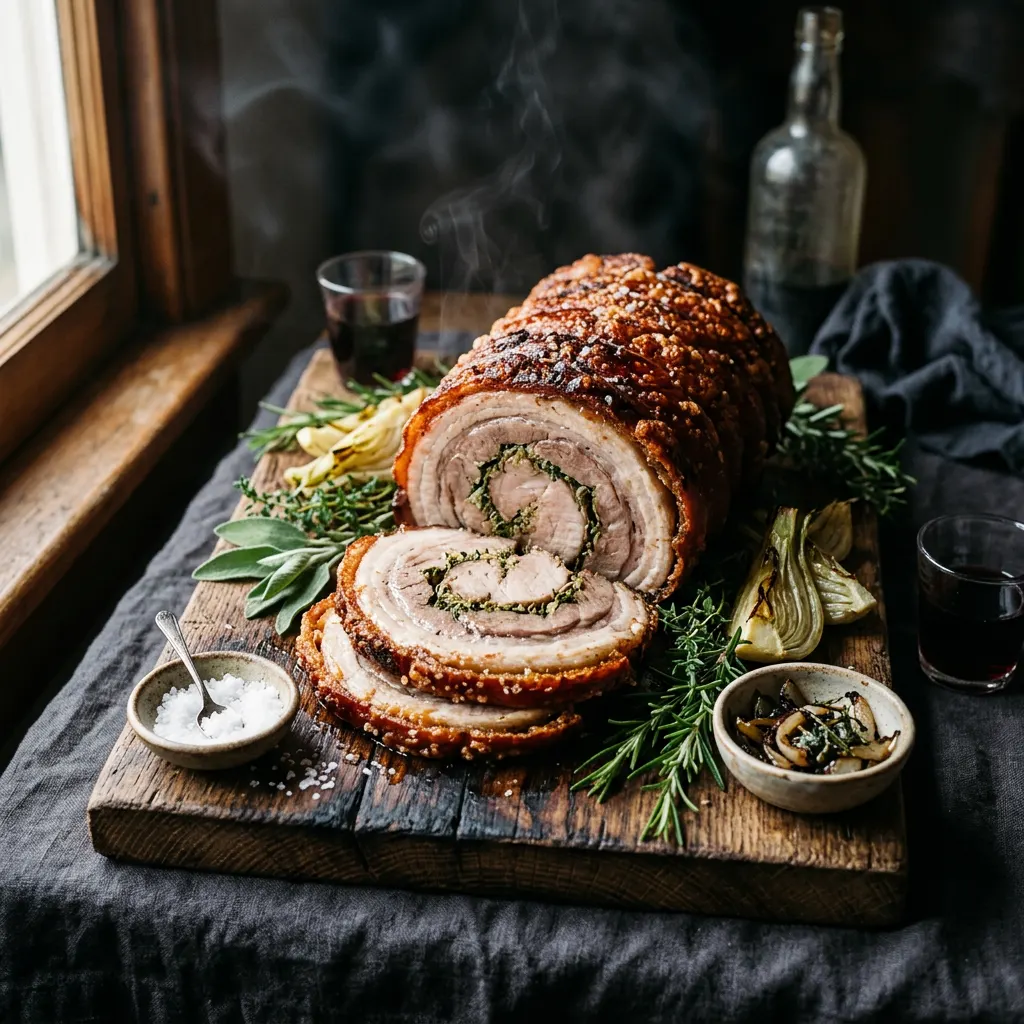
Competition-Style Smoked Porchetta Roll
Pork belly wrapped around loin, herb-stuffed, slow-smoked.
Cook Mode
One step at a time, big text, timers, and your screen stays awake. 0/17 steps done.
Ingredients
Tap to tick off · 0/14 gathered
Method
- 30 min
Butterfly the pork loin if it's not already butterflied into a flat sheet. Lay the pork belly skin-side down. Score the skin of the pork belly in a diamond pattern, being careful not to cut into the meat. Flip the belly over, meat side up. Trim any excess meat from the loin to match the dimensions of the belly as closely as possible when laid flat. This ensures an even roll.
Why it matters
Scoring the skin helps render fat and create that coveted crispy crackle, while matching the meat sizes ensures a uniform porchetta roll.
Common mistake
Cutting too deep when scoring the skin, which can cause the fat to render out too quickly and dry out.
- 20 min
Lay pork belly skin-side up. Using a very sharp knife or razor, score the skin in a diamond pattern, being careful not to cut into the meat. Flip, trim any excess fat or uneven edges on the meat side to create an even rectangle.
Why it matters
Scoring the skin allows fat to render efficiently and helps achieve that coveted crispy crackle.
Common mistake
Cutting too deep into the meat, which can cause the roll to fall apart during cooking.
- 15 min
In a small bowl, combine chopped rosemary, sage, minced garlic, crushed fennel seeds, red pepper flakes, 2 tablespoons of kosher salt, black pepper, and olive oil to form a paste. Spread this herb paste evenly over the meat side of the pork belly. Season the pork loin heavily with salt and pepper, then place it centered on one end of the herb-coated pork belly.
Why it matters
The herb paste infuses deep flavor into the pork loin and belly, creating the classic porchetta taste. Even seasoning ensures flavor in every bite.
Common mistake
Not spreading the paste evenly, leading to inconsistent flavor distribution.
- 30 min
In a bowl, combine rosemary, sage, thyme, garlic, fennel seeds, 1 tbsp salt, 1 tbsp pepper, and olive oil. Spread this mixture evenly over the meat side of the pork belly. Season the pork loin with remaining salt and pepper, then place it centered on one end of the belly. Tightly roll the pork belly around the loin. Secure the roll every 1-inch with butcher's twine.
Why it matters
A tight roll ensures even cooking and prevents the stuffing from falling out, while the herbs infuse the meat with flavor.
Common mistake
Not tying tightly enough, leading to a loose, unevenly cooked porchetta that may unravel.
- 20 min
In a small bowl, combine rosemary, sage, garlic, crushed fennel seeds, red pepper flakes, salt, and black pepper. Rub this herb mixture evenly over the meat side of both the pork belly and the butterflied pork loin. Place the pork loin on top of the seasoned pork belly. Starting from one long end, tightly roll the pork belly around the loin. Secure the roll tightly with butcher twine every 1-inch, ensuring it holds its shape.
Why it matters
A tight roll ensures uniform cooking and prevents pockets of air, which can lead to uneven texture. Even seasoning guarantees flavor in every bite.
Common mistake
Not tying the porchetta tightly enough, leading to it unrolling or cooking unevenly.
- 12h
Place the tied porchetta on a wire rack set over a baking sheet, uncovered, in the refrigerator overnight.
Why it matters
This crucial step dries out the skin, which is essential for achieving an incredibly crispy crackling exterior.
Common mistake
Skipping this step or covering the porchetta, resulting in chewy or rubbery skin instead of crispy crackle.
- 15 min
Carefully roll the pork belly tightly around the pork loin, starting from the end with the loin. Once rolled, secure the porchetta firmly with butcher's twine at 1-inch intervals along the entire length. Ensure it's TIGHT to maintain its shape during cooking.
Why it matters
A tight roll ensures even cooking, prevents the loin from drying out, and creates a uniform shape for presentation.
Common mistake
Not tying tightly enough, which can cause the porchetta to unroll or cook unevenly.
- 8h
Once rolled and tied, lightly brush the skin with olive oil. Place the porchetta on a wire rack set over a baking sheet and refrigerate uncovered for at least 8 hours, or preferably overnight.
Why it matters
This step allows the skin to dry out and form a 'pellicle,' which is crucial for achieving that crispy, crackling finish on the skin. The salt in the rub also begins to cure the meat, adding flavor and tenderness.
Common mistake
Skipping the overnight refrigeration, resulting in a rubbery, soft skin instead of a crisp crackle.
- 275°F20 min
Set your pellet grill or smoker to 275°F (135°C). Add cherry wood pellets or chunks for smoke.
Why it matters
Preheating properly ensures a stable cooking temperature from the start, crucial for consistent results.
Common mistake
Not waiting for the smoker to reach and stabilize temperature before adding the meat.
- 275°F15 min
Preheat your pellet grill or smoker to 275°F (135°C). Add cherry wood to your smoker for a mild, fruity smoke flavor that complements pork beautifully.
Why it matters
Maintaining a consistent smoker temperature is key to even cooking. Cherry wood provides a gentle smoke, enhancing the pork's natural flavors without overpowering them.
Common mistake
Not allowing the smoker to come to temperature before placing the meat, leading to uneven initial cooking.
- 24h
Once tied, generously sprinkle the scored skin of the porchetta with extra kosher salt. Place the porchetta, skin-side up, on a wire rack set over a baking sheet and refrigerate uncovered for at least 12 hours, preferably 24-36 hours.
Why it matters
The salt draws out moisture from the skin, while the refrigeration creates a dry surface (pellicle). This combined action is crucial for achieving that coveted crispy, crackly skin.
Common mistake
Skipping this step or not leaving it long enough, which results in chewy, rather than crispy, skin.
- 275°F3h 20m
Once the smoker is at temperature, place the porchetta directly on the grates, fat cap up. Insert a temperature probe into the thickest part of the pork loin. Smoke until the internal temperature reaches 145°F (63°C). This usually takes about 2.5 to 3 hours.
Why it matters
Smoking at a lower temperature allows the fat to slowly render and infuse the meat with smoke flavor. Monitoring internal temperature ensures the meat is cooked to a safe and delicious doneness without overcooking.
Common mistake
Opening the smoker too frequently, causing temperature fluctuations and extending cook time.
- 400°F1h
Increase the smoker temperature to 400°F (200°C) and continue cooking until the internal temperature reaches 160°F (71°C) and the skin is deeply golden and crispy, approximately 30-60 minutes. Keep an eye on it to prevent burning.
Why it matters
A high finishing temperature is essential for achieving the crackling skin. The higher heat quickly crisps the exterior while bringing the internal temperature to its final target.
Common mistake
Cooking at too high a temperature for too long, resulting in burnt skin and dry meat.
- 400°F30 min
If the skin isn't as crispy as desired, increase the smoker temperature to 400°F (204°C) for the last 20-30 minutes, or transfer to a hot oven, until the skin crackles. Monitor closely to prevent burning.
Why it matters
A final burst of high heat ensures maximum crispiness on the skin, providing a delightful textural contrast.
Common mistake
Burning the skin by not monitoring closely during this high-heat phase.
- 20 min
Once the internal temperature reaches 160°F (71°C) and the skin is crispy, remove the porchetta from the smoker. Tent loosely with foil and let it rest for at least 15-20 minutes.
Why it matters
Resting allows the juices to redistribute throughout the meat, ensuring a tender and moist final product. Skipping this step can lead to a dry slice.
Common mistake
Slicing the porchetta immediately after removing it from the smoker, causing all the juices to run out.
- 30 min
Remove the porchetta from the smoker and loosely tent with foil. Let it rest for at least 20-30 minutes.
Why it matters
Resting allows the juices to redistribute throughout the meat, ensuring a more tender and juicy result.
Common mistake
Cutting too soon, leading to dry meat as juices escape.
- 10 min
Carefully remove the butcher twine. Using a sharp knife, slice the porchetta into generous 1/2-inch thick rounds. Serve immediately with your favorite sides.
Why it matters
Slicing against the grain ensures tender bites. A sharp knife is crucial for clean cuts, especially through the crispy skin.
Common mistake
Using a dull knife, which can tear the meat and shatter the crackling skin.
Cooks & Reviews
Guild members can rate this recipe, log their cooks and share photos.
Sign in to continueMember reviews
No reviews yet — be the first to rate this cook.
Ask the Pitmaster about this recipe
Substitutions, scaling, technique, troubleshooting — get answers grounded in this cook.
Sign in to try the AI Pitmaster on Competition-Style Smoked Porchetta Roll. New members get 3 free questions.
Sign in to tryComments(0)
Loading comments…