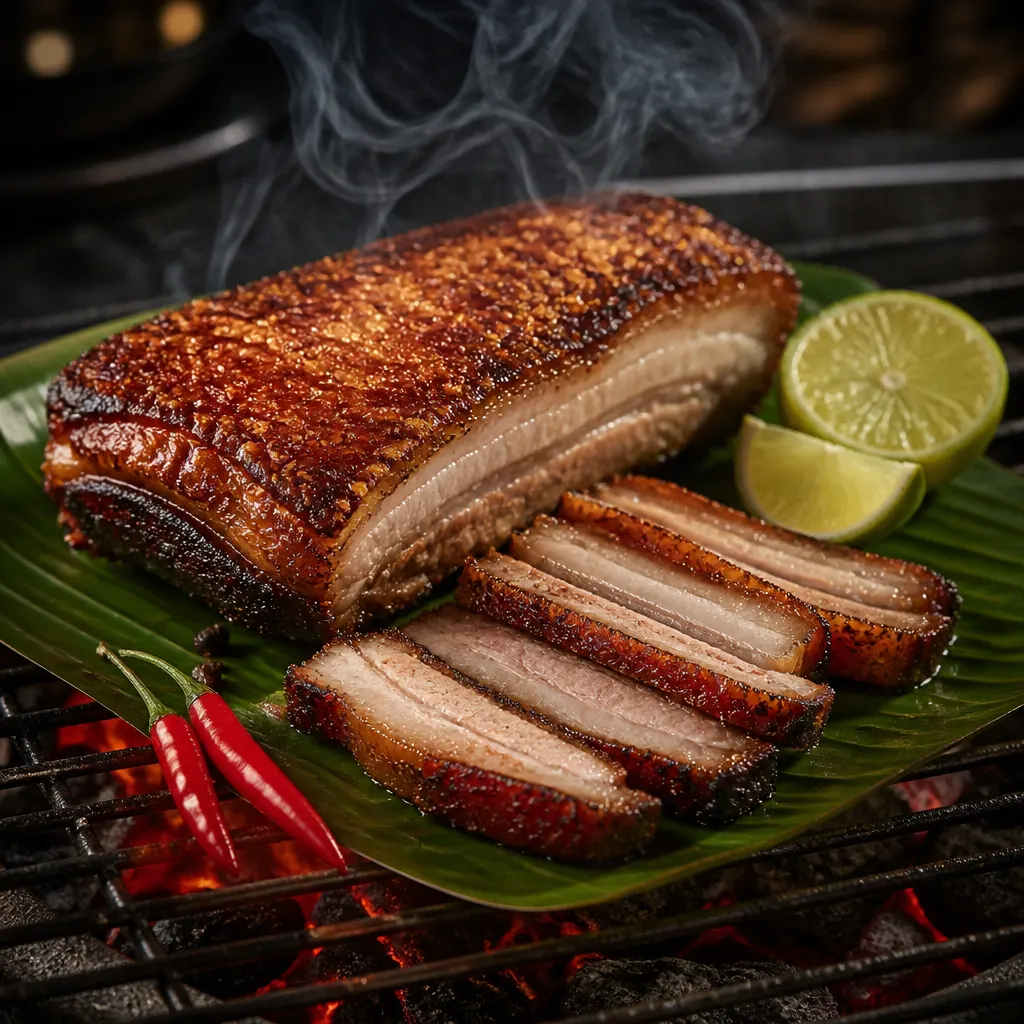
Vietnamese Five-Spice Smoked Pork Belly (Thit Quay)
The Vietnamese roast pork belly that hangs in shop windows across every Vietnamese neighborhood: mahogany meat under glass-hard crackling. The trick is the dry-cure overnight for the skin and the two-temperature cook.
Cook Mode
One step at a time, big text, timers, and your screen stays awake. 0/8 steps done.
Ingredients
Tap to tick off · 0/12 gathered
Method
- 20 min
Begin with a 5.5 lbs whole pork belly slab, skin-on. Use a sharp blade to score the skin in a tight diamond pattern, cutting through the skin but stopping before you hit the muscle. Take a skewer or pin tool and prick the skin surface hundreds of times across the entire slab. This mechanical perforation facilitates fat rendering and creates micro-ventilation points for steam to escape during the high-heat finish, which is the only way to achieve a blistered, glass-like texture rather than a rubbery rind.
Why it matters
Pricking creates the structural pathways for fat to migrate to the surface and fry the skin from the inside out.
Common mistake
Failing to prick the skin enough, resulting in hard, un-rendered patches of skin that are impossible to bite through.
- 15 min
Flip the belly meat-side up. In a bowl, whisk 3 tbsp Chinese five-spice, 2 tbsp brown sugar, 2 tbsp fish sauce, 1 tbsp soy sauce, 6 crushed garlic cloves, 1 tbsp grated ginger, 1 tbsp white pepper, and 1 tsp salt. Rub this paste deep into the meat and the scored sides. This ratio of salt to sugar and aromatics creates an osmotic gradient that pulls the flavors into the muscle fibers while the ginger enzymes help tenderize the protein during the long cold-cure.
Why it matters
The five-spice and fish sauce provide the deep umami and aromatic profile characteristic of authentic Thit Quay.
Common mistake
Getting the wet marinade on the skin, which introduces moisture and sugar that will burn before the skin can crisp.
- 10 min
Wipe the skin side meticulously with a dry paper towel until no moisture remains. Brush 1 tsp white vinegar over the skin; the acidity helps break down surface proteins of the dermis. Apply 2 tbsp of coarse salt in an even, thick layer across the top of the skin. This salt crust acts as a desiccant, pulling moisture out of the pork skin and concentrating it in the salt layer, effectively 'curing' the rind for a sharper crackle.
Why it matters
Vinegar and salt work together to chemically strip moisture from the skin's surface, essential for a brittle texture.
Common mistake
Using fine salt instead of coarse salt, which can over-salt the meat by dissolving too quickly.
- 24h
Place the pork belly uncovered on a wire rack set over a rimmed baking sheet. Refrigerate for 24 hours (up to 48 hours). The refrigerator's fan creates a low-humidity environment that further dries the skin while the internal meat marinates. Ensure the meat remains between 34-38°F to stay out of the 40-140°F danger zone. By the end of this phase, the skin should feel leathery and look translucent.
Why it matters
Cold air circulation is the secret to a dry pellicle, which is necessary for smoke adhesion and skin shattering.
Common mistake
Covering the pork with plastic wrap, which traps moisture and ruins the dehydration process.
- 275°F4h 30m
Preheat your smoker to 275°F using apple wood for a mild, fruity smoke profile that won't overpower the five-spice. Scrape the salt crust entirely off the skin and wipe it with a dry cloth. Place the belly skin-side up in the smoker. Smoke until the internal temperature reaches 195°F. This allows the collagen in the belly to break down into gelatin, ensuring the meat is tender enough to contrast with the crispy top.
Why it matters
The low and slow phase renders the internal fat and breaks down tough connective tissue for a succulent bite.
Common mistake
Pulling the meat too early; if the fat isn't fully rendered, the belly will be greasy rather than tender.
- 475°F25 min
Once the meat hits 195°F, increase the smoker temp to 475°F or move the belly to a preheated oven. The intense heat causes the remaining moisture in the skin to rapidly expand and 'puff' the skin through the holes you pricked earlier. Roast for 20-30 minutes until the skin is a uniform mahogany color and covered in tiny bubbles. Listen for a hollow 'clack' when the skin is tapped.
Why it matters
This thermal shock is what transforms dry, leathery skin into aerated, crispy crackling.
Common mistake
Walking away during this step; the transition from golden-brown to burnt happens in seconds.
- 200°F20 min
Remove the belly from the heat and rest it on a wire rack for 20 minutes. Resting allows the internal juices to redistribute so they don't purge when sliced, but the wire rack is critical to maintain airflow—if you rest it on a flat board, the bottom of the meat will steam and lose its texture. During this time, the skin will fully harden into its final glass-like state.
Why it matters
Resting prevents the succulent juices from washing away the crispness of the skin during the carving phase.
Common mistake
Tenting the meat with foil, which creates steam and immediately softens the crispy skin you worked so hard for.
- 10 min
Using a heavy meat cleaver, place the belly skin-side down or use a single, decisive vertical strike to chop the slab into bite-sized squares. Avoid a sawing motion, which can tear the skin away from the meat. Each piece should have a layer of meat, rendered fat, and a distinct crown of crackling. Serve immediately alongside rice or vermicelli to enjoy the peak contrast of temperatures and textures.
Why it matters
Proper chopping technique preserves the structural integrity of the bite-sized 'window' of pork.
Common mistake
Using a small, dull knife that slides off the skin, creating a safety hazard and ragged meat slices.
6 more steps locked
You've seen the ingredients and the first two steps. Pit Members get every step, every temp, every glaze — plus the Cook Monitor and Pitmaster AI.
See Membership OptionsAlready a member? Sign in.
Sauce It
Cooks & Reviews
Guild members can rate this recipe, log their cooks and share photos.
Sign in to continueMember reviews
No reviews yet — be the first to rate this cook.
Ask the Pitmaster about this recipe
Substitutions, scaling, technique, troubleshooting — get answers grounded in this cook.
Sign in to try the AI Pitmaster on Vietnamese Five-Spice Smoked Pork Belly (Thit Quay). New members get 3 free questions.
Sign in to tryComments(0)
Loading comments…