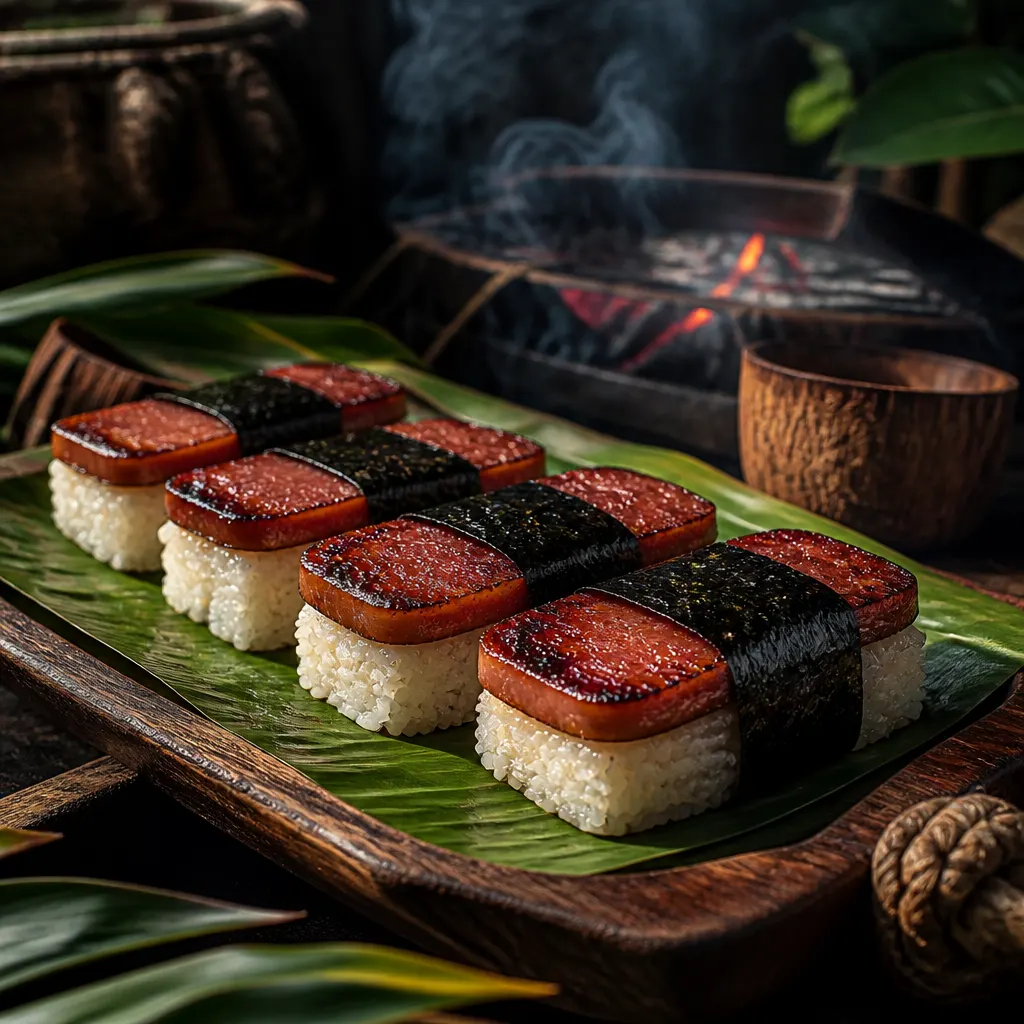
Smoked Spam Musubi
Don't laugh — musubi is the most beloved snack in Hawaii: a block of rice topped with teriyaki-glazed Spam and wrapped in nori. Running the Spam through the smoker first sounds like a joke and tastes like genius. Fun, cheap, and a guaranteed conversation piece. The gateway snack of island cooking.
Cook Mode
One step at a time, big text, timers, and your screen stays awake. 0/6 steps done.
Ingredients
Tap to tick off · 0/8 gathered
- — GLAZE —
- — TO BUILD —
Method
- 15 min
Begin by whisking 3 tbsp soy sauce, 2 tbsp brown sugar, 1 tbsp mirin, and 1 tsp grated ginger in a small bowl until the sugar is fully dissolved. This mixture provides the high-sugar content necessary for Maillard browning in the smoker. Open the Spam can and slice the loaf into 8 even planks, approximately 1/2 inch thick; uniform thickness is essential for even smoke absorption and heat distribution. These slices will serve as our protein canvas for the smoke and glaze application.
Why it matters
The glaze equilibrates salt and sugar to cut through the heavy fat content of the processed meat.
Common mistake
Slicing planks too thin, which leads to rubbery, over-dehydrated meat.
- 250°F20 min
Preheat your smoker to a stable 250°F using guava or apple wood for a mild, sweet smoke profile. Clean the grates thoroughly to ensure the Spam releases easily without tearing. In competition and instructor-grade cooking, temperature stability is key to avoiding 'the danger zone' of 40-140°F too quickly while still allowing enough time for smoke particulates to adhere to the surface. Ensure your fire is burning clean with 'blue smoke' to avoid a bitter creosote flavor on the delicate glaze.
Why it matters
Stable temps and clean smoke prevent bitter flavor deposits and ensure the fat renders without burning.
Common mistake
Using heavy woods like mesquite which totally overpower the subtle ingredients in the glaze.
- 250°F20 min
Place the 8 Spam planks directly on the grill grates, ensuring at least one inch of space between each piece for maximum airflow. Smoke for 20 minutes without opening the lid. During this phase, the heat begins to render the surface fats, creating a tacky surface that allows smoke to penetrate. You are looking for the edges to slightly darken and the pink color to transition into a deeper rose hue. This step is critical for developing the 'bark' or base color before the wet glaze is applied.
Why it matters
The initial dry heat period allows the meat to take on smoke before the glaze creates a moisture barrier.
Common mistake
Opening the lid frequently, which drops the temperature and stalls the rendering process.
- 160°F20 min
Liberally brush the top of each Spam plank with the soy-ginger glaze. Close the lid and smoke for another 15-20 minutes until the internal temperature of the Spam reaches 160°F for food safety and optimal texture. The sugar in the 2 tbsp of brown sugar and 1 tbsp mirin will caramelize, creating a sticky, mahogany-colored lacquer. For professional results, flip the planks during the last 5 minutes and glaze the second side for full coverage and uniform appearance.
Why it matters
Reaching an internal temp of 160°F ensures the product is fully heated through and the sugars have properly polymerized.
Common mistake
Applying glaze too early, which can cause the sugars to burn and turn bitter.
- 10 min
While the Spam is finishing in the smoker, prepare the foundation using 3 cups of seasoned, cooked sushi rice. Place the musubi mold on a clean surface and pack approximately 1/3 cup of rice into the bottom. Use the press tool to apply significant downward force, creating a dense 1-inch thick block. This compression is vital; the starch in short-grain rice acts as the 'glue' that holds the snack together. The rice should be warm, not cold, to ensure it remains pliable and adhesive.
Why it matters
High-pressure compression creates a structural foundation that prevents the musubi from crumbling.
Common mistake
Using non-short-grain rice or loose packing, which causes the musubi to fall apart.
- 10 min
Place a hot Spam plank on the pressed rice block while still in the mold and press one final time to bond the sticky glaze to the rice. Remove the mold and place the block in the center of a halved nori sheet (rough side up). Wrap the nori tightly around the middle, overlapping the ends at the bottom. The residual heat and moisture from the 160°F Spam and warm rice will naturally hydrate the seaweed, creating a 'shrink-wrap' seal that locks the components together. Allow to rest for 5 minutes before serving to ensure the nori has softened for a clean bite.
Why it matters
The thermal carryover from the meat to the nori creates the final structural seal of the snack.
Common mistake
Wrapping with the slick side of the nori inward, which prevents the seaweed from sticking to itself.
Sauce It
Cooks & Reviews
Guild members can rate this recipe, log their cooks and share photos.
Sign in to continueMember reviews
No reviews yet — be the first to rate this cook.
Ask the Pitmaster about this recipe
Substitutions, scaling, technique, troubleshooting — get answers grounded in this cook.
Sign in to try the AI Pitmaster on Smoked Spam Musubi. New members get 3 free questions.
Sign in to tryComments(0)
Loading comments…