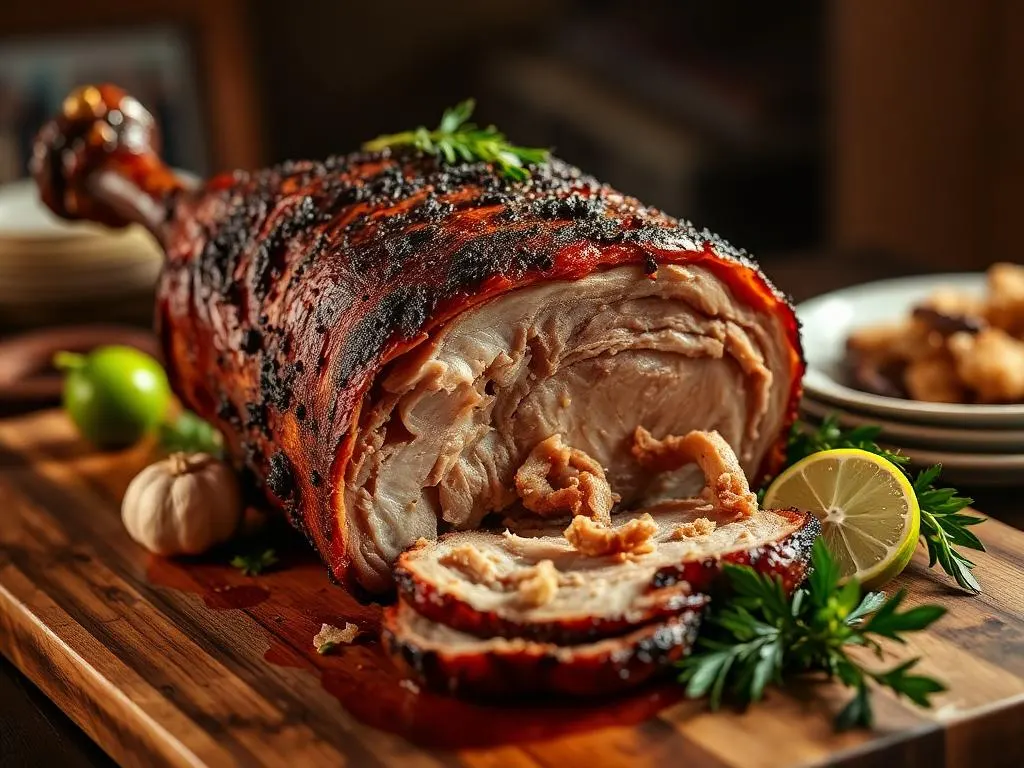
Smoked Pernil — Brazilian Whole Pork Leg
A whole pork leg, injected and marinated in garlic, lime, and white wine, then smoked until the meat surrenders and the skin turns to glass. This is a centerpiece for a crowd and a full-day commitment. Get the skin right and it's the most impressive thing on the table.
Cook Mode
One step at a time, big text, timers, and your screen stays awake. 0/10 steps done.
Ingredients
Tap to tick off · 0/9 gathered
- — MAIN —
- — MARINADE & INJECTION —
Method
- 20 min
In a high-speed blender, combine 1 head of peeled garlic, 1 cup lime juice, 1 cup dry white wine, 0.5 cup olive oil, 3 tbsp coarse salt, 2 tbsp dried oregano, 1 tbsp black pepper, and 2 crushed bay leaves. Blend on high until the mixture is a smooth, stable emulsion. This acidic, saline-rich profile is scientifically designed to penetrate the dense muscle fibers of the 13 lb bone-in leg, denaturing proteins to improve moisture retention. Strain the mixture through a fine-mesh sieve; set aside 2 cups of liquid for injection and keep the remaining solids and liquid for the surface marinade.
Why it matters
The acid and salt work in tandem to break down tough connective tissue and season the meat deep at the bone level.
Common mistake
Failing to strain the marinade, which leads to a clogged injector needle and uneven salt distribution.
- 15 min
Using a professional meat injector, draw the strained marinade and pierce the pork leg every square inch. Focus your efforts on the thickest muscle groups of the ham, plunging the needle deep toward the bone and slowly withdrawing while depressing the plunger. This ensures the 'danger zone' near the bone is properly seasoned and acidic, which helps prevent spoilage during the long, slow rise in temperature. Avoid puncturing through the skin side, as you want to keep the skin as pristine and dry as possible for the finishing phase.
Why it matters
Internal seasoning is the only way to ensure the center of a 13 lb roast isn't bland and dry.
Common mistake
Injecting only the surface, which leaves the inner-most meat near the bone unseasoned and grey.
- 48h
Turn the pork leg skin-side up and use a sharp utility knife to score the rind in a 1-inch tight crosshatch pattern, cutting through the skin and fat but stopping before you hit the meat. Rub the remaining non-strained marinade solids and liquid aggressively into the meat side and deep into the scored cracks of the skin. Place the leg in a large non-reactive container and refrigerate uncovered for 24 to 48 hours. This duration is critical for the salt to penetrate the protein while the refrigerator's low humidity beginnings the drying process of the skin.
Why it matters
An uncovered cold cure allows the skin to lose moisture, leading to a superior, glass-like crackling.
Common mistake
Covering the meat with plastic wrap, which traps moisture and turns the skin to rubber.
- 1h
Remove the pork from the refrigerator 60 minutes before smoking. Use paper towels to pat the skin surface bone-dry, ensuring no marinade residue remains on the rind. As the meat sits at room temperature, a 'pellicle'—a thin, tacky protein film—will form on any exposed meat surfaces. This film is essential for smoke adhesion, allowing the particulates from the oak and apple wood to bind to the meat rather than just washing over it. Ensure the skin remains free of any oil or moisture at this stage.
Why it matters
A dry surface and visible pellicle are the foundations for both deep smoke flavor and crispy skin.
Common mistake
Putting a wet, cold leg straight onto the smoker, which results in 'dirty' smoke flavor and soggy skin.
- 250°F30 min
Preheat your smoker to a consistent 250°F using a blend of oak for heat and apple wood for a sweet, mild finish. Clean the grates thoroughly and ensure you have a clean-burning fire with thin blue smoke. Place the pork leg on the grates skin-side up. This orientation is vital: it allows the rendering fat from the cap to baste the meat below while the dry, hot air of the convection currents circulates over the skin to continue the drying process. Position the thickest part of the leg toward the heat source.
Why it matters
Correct orientation uses the animal's own fat to protect and flavor the meat during the 12-hour cook.
Common mistake
Cooking with 'white' smoke, which deposits bitter creosote on the skin.
- 160°F6h
Smoke the pork leg undisturbed for approximately 6 hours or until the internal temperature reaches the 'stall' around 160°F. During this phase, moisture evaporates from the surface, cooling the meat and halting the temperature rise. Resist the urge to wrap the meat in foil as this would steam the skin; instead, if the meat sides are darkening too quickly, loosely tent the meat portions only, leaving the skin exposed. The goal is to maximize smoke exposure while the meat is still below 140°F (the danger zone) to ensure food safety and flavor development.
Why it matters
Maintaining the 250°F pit temp ensures the meat passes through the 40-140°F zone quickly enough to prevent bacterial growth.
Common mistake
Wrapping the skin in foil, which destroys the texture and turns it into a soggy mess.
- 195°F5h
Continue cooking as the internal temperature slowly climbs from 160°F toward 195°F. In this window, collagen begins to convert into silky gelatin, which is what gives Pernil its signature succulent mouthfeel. Monitor the skin; it should look hard and dark gold. Use a probe to check tenderness in the thickest part of the ham—when it slides in with zero resistance, like room-temperature butter, the internal structure has finally surrendered. This usually occurs between 190°F and 195°F.
Why it matters
The transition from collagen to gelatin requires time and specific internal temperatures to achieve competition-grade tenderness.
Common mistake
Pulling the meat based on time rather than the 'probe-tender' tactile feel.
- 425°F15 min
If the skin has not fully crisped, increase the smoker temperature to 425°F or carefully use a propane torch to blister the scored skin surface. Watch the skin intensely; it will bubble and 'puff' as the remaining moisture is driven out of the fat cells. This happens very rapidly and can go from perfect to burnt in under 60 seconds. The skin is done when it feels hard to the touch and rings like glass when tapped with the back of a knife.
Why it matters
The high-heat blast provides the Maillard reaction and dehydration needed for the 'glass' texture.
Common mistake
Walking away during this step, resulting in charred, bitter skin.
- 200°F1h
Transfer the whole leg to a carving board and let it rest uncovered for at least 60 minutes. Do not tent with foil, as the trapped steam will soften the crackling you just perfected. During this time, the internal temperature may rise another 5°F (carryover cooking), and more importantly, the muscle fibers will relax and reabsorb the rendered juices. Slicing too early will cause the moisture to dump onto the board, leaving the meat dry.
Why it matters
Resting allows for pressure equilibration, ensuring every slice is juicy from the first to the last.
Common mistake
Cutting into the meat immediately, which drains the internal moisture.
- 15 min
Use a heavy knife or kitchen shears to remove the crackling in large shards first. Then, identify the grain of the ham and slice across it to ensure maximum tenderness. For a traditional Pernil presentation, serve large, thick slices of the succulent pork alongside pieces of the glass-like skin. Ensure each guest receives a portion of the skin to contrast the rich, garlic-heavy meat. Discard the bay leaves and any large pockets of unrendered fat.
Why it matters
Proper carving technique—slicing against the grain—is the final step in ensuring the perceived tenderness of the meat.
Common mistake
Slicing with the grain, which makes even perfectly cooked meat feel stringy and tough.
8 more steps locked
You've seen the ingredients and the first two steps. Pit Members get every step, every temp, every glaze — plus the Cook Monitor and Pitmaster AI.
See Membership OptionsAlready a member? Sign in.
Sauce It
Cooks & Reviews
Guild members can rate this recipe, log their cooks and share photos.
Sign in to continueMember reviews
No reviews yet — be the first to rate this cook.
Ask the Pitmaster about this recipe
Substitutions, scaling, technique, troubleshooting — get answers grounded in this cook.
Sign in to try the AI Pitmaster on Smoked Pernil — Brazilian Whole Pork Leg. New members get 3 free questions.
Sign in to tryComments(0)
Loading comments…