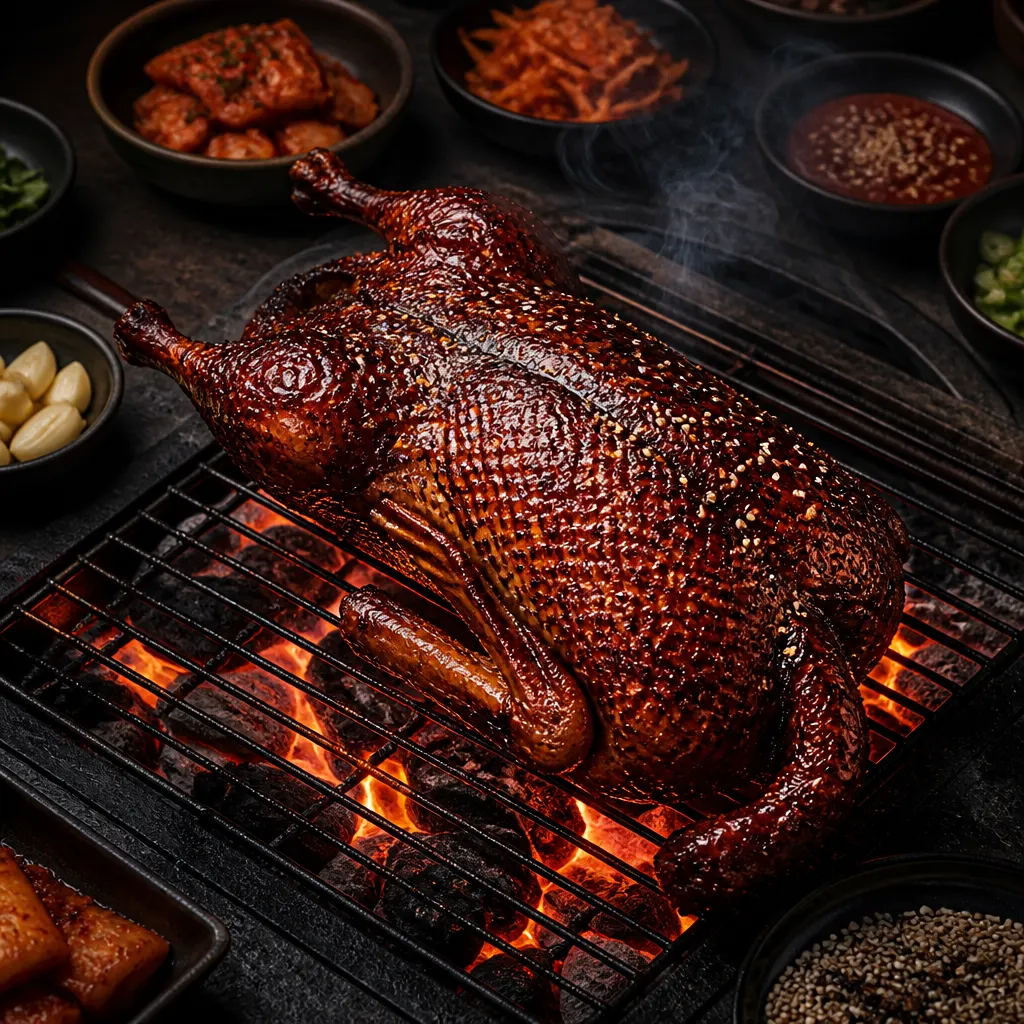
Smoked Korean-Spiced Whole Duck
Duck is prized in Korean cooking (ori gui, grilled duck, is a whole genre), and smoking a whole bird with a doenjang-and-gochujang lacquer produces something spectacular. A pricked skin, a long dry brine, and a patient render get you the crispy skin under a deep mahogany lacquer.
Cook Mode
One step at a time, big text, timers, and your screen stays awake. 0/8 steps done.
Ingredients
Tap to tick off · 0/16 gathered
Method
- 20 min
Begin with a 5.5 lb whole duck, ensuring it is patted extremely dry. Using a clean skewer or needle, prick the skin every half inch across the breasts and thighs at a shallow 45-degree angle. It is mandatory to pierce the fat layer without puncturing the underlying meat; puncturing the meat allows juices to escape, while failing to pierce the fat prevents rendering, resulting in a rubbery, greasy texture. This creates hundreds of micro-vents for the heavy fat layer to escape during the smoke.
Why it matters
Pricking the skin provides the only escape route for thick subcutaneous fat, which is the mechanical requirement for crispy poultry skin.
Common mistake
Puncturing the meat with the skewer, which causes the internal juices to purge and results in dry flesh.
- 15 min
In a small bowl, combine 2 tbsp salt, 1 tbsp gochugaru, 1 tbsp brown sugar, and 1 tsp white pepper. Rub this cure aggressively over the entire exterior and throughout the cavity of the duck. The salt utilizes osmosis to pull moisture out of the skin while simultaneously seasoning the meat deep into the muscle fiber, which is critical for waterfowl that can otherwise taste bland and gamey.
Why it matters
The dry brine denatures proteins to retain moisture while simultaneously dehydrating the skin for better texture.
Common mistake
Applying the rub unevenly, which leads to splotchy skin color and inconsistent seasoning levels.
- 24h
Place the seasoned duck on a wire rack over a rimmed baking sheet and refrigerate uncovered for 24 hours. This serves two purposes: it allows the salt to fully penetrate the meat, and the cold, circulating air dehydrates the epidermis to form a 'pellicle'—a tacky surface that smoke particles can easily adhere to. This controlled dehydration ensures the skin will fry in its own rendering fat rather than steaming in its own moisture.
Why it matters
A dry, cold skin surface is the only way to achieve a mahogany color and crispy bite in a low-temperature smoking environment.
Common mistake
Covering the bird with plastic wrap, which traps moisture and ruins the skin-drying process.
- 275°F30 min
Remove the duck from the fridge and stuff the cavity with 4 whole scallions, 4 smashed garlic cloves, and 2 inches of sliced ginger. These ingredients provide an 'aromatic steam' from the inside out, balancing the rich fat. Preheat your smoker to 275°F using a combination of apple and oak wood. Place a foil-lined drip pan beneath the grate where the duck will sit to safely collect the high volume of rendered fat, preventing grease fires.
Why it matters
Correct smoker stabilization and aromatic stuffing ensure the bird cooks evenly while gaining interior depth of flavor.
Common mistake
Forgetting the drip pan, which causes rendered duck fat to hit the fire pot and create acrid, bitter smoke.
- 275°F3h
Place the duck breast-side up on the grates. Smoke at 275°F for approximately 150-180 minutes. Monitor the 40-140°F danger zone; ensure the internal temperature of the bird rises steadily through this window within 4 hours for food safety. The target at the end of this phase is an internal thigh temp of 160°F. During this time, the heat is slowly melting the fat through the holes you pricked earlier, basting the meat in its own juices.
Why it matters
Low and slow heat is necessary to melt the thick duck fat without overcooking the delicate breast meat.
Common mistake
Opening the lid too often to check progress, which drops the temperature and halts the fat-rendering process.
- 15 min
While the duck smokes, whisk together 2 tbsp doenjang, 2 tbsp gochujang, 2 tbsp honey or rice syrup, 2 tbsp soy sauce, 1 tbsp toasted sesame oil, 1 tbsp rice vinegar, 1 head of grated garlic, and 1 tbsp grated ginger in a saucepan. Simmer over low heat for 5-10 minutes until the mixture thickens into a glossy, pungent lacquer. This concentrated sauce provides the 'umami' punch and the sugars required for the final mahogany glaze.
Why it matters
Simmering the glaze reduces water content, ensuring it tacks up on the bird rather than sliding off.
Common mistake
Using high heat, which scorches the sugars in the gochujang and honey, creating a bitter sauce.
- 175°F30 min
Once the internal temperature reaches 160°F, paint a thick layer of the lacquer over the entire bird. Apply three distinct layers, waiting 10 minutes between each to let the heat 'set' the glaze. Continue cooking until the thickest part of the thigh reaches 170-175°F. This higher finishing temp is necessary for duck legs to ensure the connective tissue is fully tender, while the glaze creates a sticky, competition-grade finish.
Why it matters
Layering the glaze builds a flavor crust that is significantly more impactful than a single coat applied at the end.
Common mistake
Glazing too early, which causes the sugars to burn before the meat is fully cooked through.
- 20 min
Remove the duck from the smoker and place it on a warm platter. Let it rest for 20 minutes before carving. During this time, carryover cooking will finish the bird, and the internal juices—which have been pushed toward the center by the heat—will redistribute back through the muscle fibers. This ensures that when you carve the duck, the moisture stays in the meat rather than running out onto the cutting board.
Why it matters
Resting allows muscle fibers to relax, which is the final step in ensuring the meat is succulent and the glaze stays intact.
Common mistake
Carving the duck immediately, which results in the loss of nearly all internal moisture and dry meat.
6 more steps locked
You've seen the ingredients and the first two steps. Pit Members get every step, every temp, every glaze — plus the Cook Monitor and Pitmaster AI.
See Membership OptionsAlready a member? Sign in.
Sauce It
Cooks & Reviews
Guild members can rate this recipe, log their cooks and share photos.
Sign in to continueMember reviews
No reviews yet — be the first to rate this cook.
Ask the Pitmaster about this recipe
Substitutions, scaling, technique, troubleshooting — get answers grounded in this cook.
Sign in to try the AI Pitmaster on Smoked Korean-Spiced Whole Duck. New members get 3 free questions.
Sign in to tryComments(0)
Loading comments…