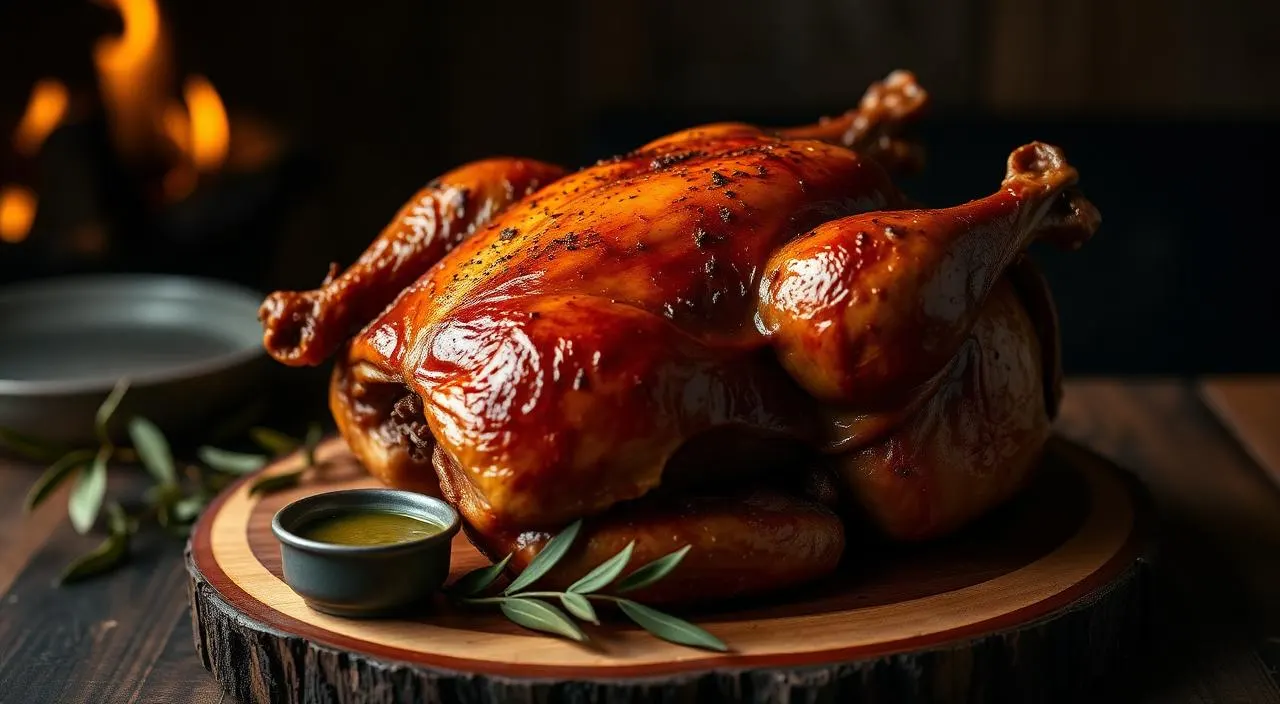
Smoked Adobo Pollo a la Brasa
Two similar-but-different traditions running into each other. Peruvian pollo a la brasa (soy, cumin, garlic, dark beer) merges with Filipino adobo (soy, vinegar, bay leaves, black pepper, coconut milk). The chicken gets brined in the adobo liquid first, then smoked with the pollo a la brasa rub.
Cook Mode
One step at a time, big text, timers, and your screen stays awake. 0/8 steps done.
Ingredients
Tap to tick off · 0/15 gathered
- — FILIPINO ADOBO BRINE —
- — PERUVIAN RUB —
- — CHICKEN —
Method
- 24h
Begin by spatchcocking the 4-5 lb chicken, removing the backbone to allow the bird to lay flat for even cooking. In a large container or heavy-duty vacuum bag, combine 0.5 cup soy sauce, 0.5 cup white vinegar, 1 cup water, 8 smashed garlic cloves, 4 bay leaves, 1 tbsp peppercorns, and 13 oz of coconut milk. Submerge the chicken fully in this mixture; the vinegar and soy provide osmotic pressure to drive the coconut fats and aromatics deep into the muscle fibers. Refrigerate for 12 to 24 hours, ensuring the meat stays below 40°F to prevent bacterial growth.
Why it matters
The brine equilibrates moisture and seasons through the flesh; skipping it gives you dry, bland chicken.
Common mistake
Brining for less than 12 hours, which fails to allow the larger molecules in the coconut milk to penetrate the meat.
- 1h
Remove the chicken from the brine and discard the liquid. Pat the skin extremely dry using paper towels; moisture is the enemy of smoke absorption and crispy skin. Place the chicken on a wire rack over a sheet pan and return it to the refrigerator uncovered for at least 60 minutes. This cold-air circulation forms a 'pellicle'—a tacky surface layer that allows smoke particulates to adhere better while helping the skin render efficiently during the cook.
Why it matters
A dry surface is essential for smoke adhesion and prevents the meat from steaming rather than roasting.
Common mistake
Applying rub to a wet bird, which creates a muddy paste that slides off during the smoke.
- 15 min
In a small bowl, whisk together 2 tbsp ají amarillo paste, 2 tbsp ground cumin, 1 tbsp smoked paprika, 1 tbsp dried oregano, 6 minced garlic cloves, 2 tbsp soy sauce, 1 tbsp vegetable oil, and the juice of 1 lime. Apply this thick paste to the chicken, focusing on the meat under the skin where possible to prevent the spices from scorching. The oil in the rub acts as a heat conductor, while the lime juice provides a final acidic punch to balance the earthy cumin.
Why it matters
Getting seasonings under the skin ensures flavor is delivered directly to the protein rather than just the exterior fat.
Common mistake
Neglecting to season the underside of the bird, leading to uneven flavor profiles.
- 275°F30 min
Preheat your smoker to 275°F using apple or cherry wood pellets. These fruitwoods provide a mild, sweet smoke profile that complements the coconut and vinegar without overpowering the delicate poultry. Ensure your fire is producing 'blue smoke'—a thin, nearly invisible translucent vapor—rather than thick white billowy smoke, which contains creosote and will make the adobo brine taste bitter/metallic.
Why it matters
Starting with a clean fire prevents acrid flavors from ruining the complex marinade profile.
Common mistake
Placing meat in the smoker before it has reached a stable temperature and clean smoke state.
- 275°F1h 30m
Place the chicken skin-side up on the grate, away from the direct heat source. Close the lid and maintain a steady 275°F. Monitor the internal temperature using a probe inserted into the thickest part of the thigh, making sure not to hit the bone. Smoke until the internal temperature reaches 155°F. This lower temperature allows the fat in the coconut-brined skin to begin rendering without tightening the proteins too quickly.
Why it matters
Controlled heat keeps the chicken in the safe zone while maximizing the window for smoke absorption.
Common mistake
Opening the lid frequently to peek, which causes temperature swings and dry meat.
- 165°F10 min
Once the chicken hits 155°F internally, move it directly over the heat source or crank your grill to 450°F. Place the bird skin-side down for 5-7 minutes. Watch for flare-ups from the rendered fat and oil-based rub. You are looking for 'Pollo a la Brasa' characteristics: charred spots and bubbling, crispy skin. Flip the bird for the final 2 minutes to ensure the underside is fully set and the internal temperature reaches a food-safe 165°F in the breast and 175°F in the thigh.
Why it matters
High heat is the only way to transform rubbery smoked skin into the crispy texture expected of Peruvian chicken.
Common mistake
Leaving the bird unattended during the crisping phase, leading to charred, bitter skin from the fat drippings.
- 15 min
Transfer the chicken to a warm cutting board and let it rest undisturbed for 10-15 minutes. During this time, carryover cooking will finish the bird, and the internal juices will redistribute from the center back to the surface fibers. If you cut it immediately, the moisture gained from the 24-hour brine will pour out onto the board, leaving the meat dry.
Why it matters
Resting allows muscle fibers to relax and reabsorb juices, ensuring a succulent final product.
Common mistake
Tenting too tightly with foil, which steams the skin you just worked hard to crisp.
- 5 min
Carve the bird into eight pieces: two drumsticks, two thighs, and four breast quarters. Serve immediately with a side of aji verde (green sauce). The combination of the Filipino vinegar-based brine and the Peruvian chili rub should yield a deeply mahogany-colored bird with a complex, tangy, and earthy flavor profile that represents the best of both worlds.
Why it matters
Proper carving ensures every guest receives a mix of crispy skin and juicy, seasoned meat.
Common mistake
Serving without an acidic sauce to cut through the richness of the coconut-infused meat.
Sauce It
Cooks & Reviews
Guild members can rate this recipe, log their cooks and share photos.
Sign in to continueMember reviews
No reviews yet — be the first to rate this cook.
Ask the Pitmaster about this recipe
Substitutions, scaling, technique, troubleshooting — get answers grounded in this cook.
Sign in to try the AI Pitmaster on Smoked Adobo Pollo a la Brasa. New members get 3 free questions.
Sign in to tryComments(0)
Loading comments…