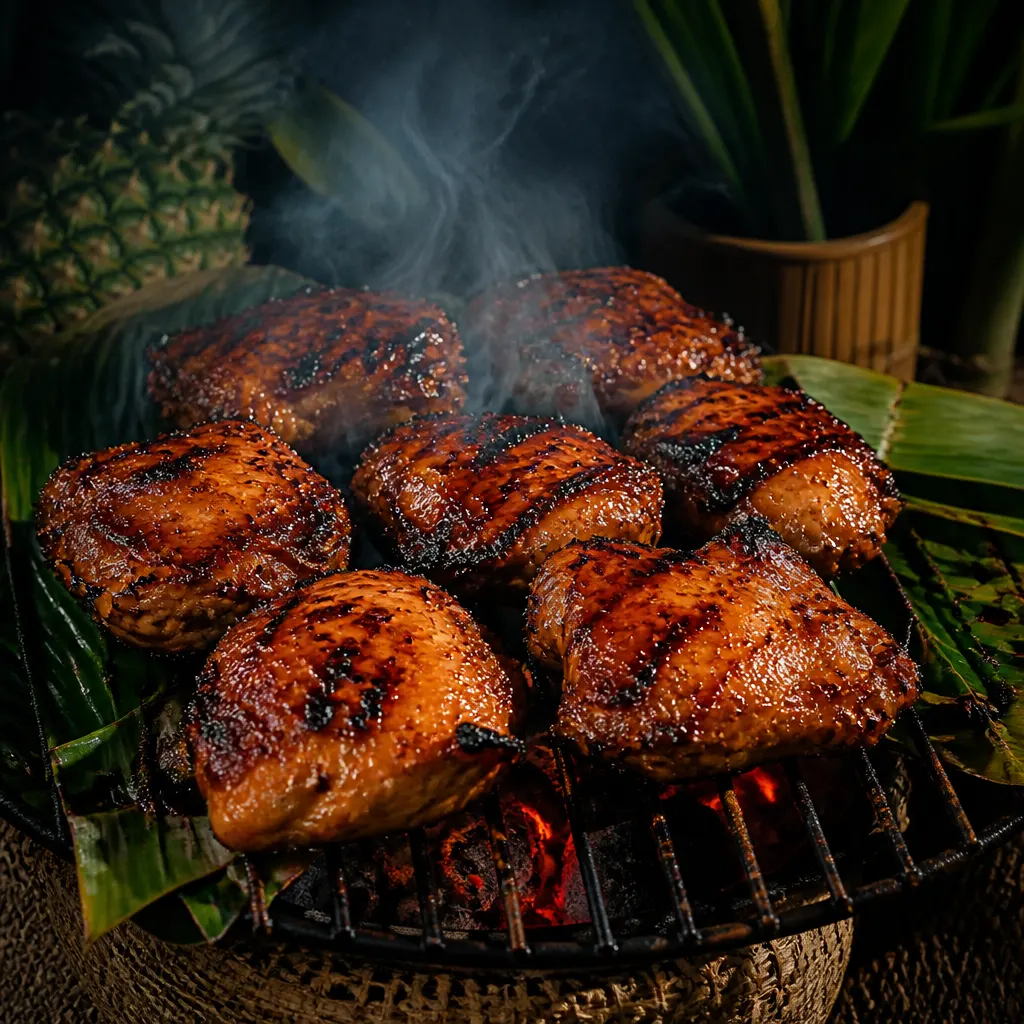
Huli Huli Chicken
The roadside chicken you smell before you see it at any Hawaiian fundraiser. Huli means turn, because it was traditionally flipped over coals. The magic is in the glaze — pineapple juice, soy, ginger, and brown sugar caramelized into something addictive. Thighs keep it forgiving for a first try.
Cook Mode
One step at a time, big text, timers, and your screen stays awake. 0/9 steps done.
Ingredients
Tap to tick off · 0/9 gathered
- — MAIN —
- — HULI HULI GLAZE —
Method
- 15 min
Begin by whisking together the Huli Huli glaze components: 0.5 cup pineapple juice, 0.333 cup soy sauce, 0.25 cup ketchup, 0.25 cup brown sugar, 2 tbsp rice vinegar, 1 tbsp grated fresh ginger, 3 cloves grated garlic, and 1 tsp sesame oil. Whisk until the sugar is fully dissolved and the ginger/garlic are evenly distributed. Crucially, pour half of this mixture into a separate container to reserve for basting and serving; this prevents cross-contamination from the raw poultry and ensures you have a clean finishing sauce.
Why it matters
The acidity in the pineapple and vinegar tenderizes the meat while the sugars provide the base for caramelization.
Common mistake
Using the entire batch of glaze as a marinade and having no clean sauce left for the final glazing stages.
- 38°F12h
Place the 3.5 lbs of bone-in, skin-on chicken thighs into a vacuum bag or heavy-duty zip-top bag and pour in the non-reserved half of the glaze. If using a zip-top bag, use the water displacement method to remove all air, ensuring total surface contact between the liquid and the skin. Marinate in the refrigerator for at least 4 hours, but ideally 12 hours. For advanced results, use the freeze-marinade technique where you freeze the bagged chicken to allow ice crystals to rupture muscle fibers, pulling the soy and ginger deeper into the protein.
Why it matters
Longer marination allows the salt in the soy sauce to penetrate the deep muscle tissue of the thigh.
Common mistake
Marinating for less than 2 hours, which only seasons the surface and leaves the interior bland.
- 1h
Remove the thighs from the marinade and pat the skin side very dry with paper towels. Arrange the chicken on a wire rack over a sheet pan and let it sit uncovered in the refrigerator for 30–60 minutes. This air-drying process allows the skin to form a slight pellicle and removes excess moisture that would otherwise steam the skin rather than allowing it to become bite-through. Meanwhile, let the chicken temper slightly toward room temperature to ensure even heat penetration once it hits the cooker.
Why it matters
A dry surface is essential for smoke adhesion and for achieving the desired bite-through skin texture in competition-style poultry.
Common mistake
Putting wet, dripping chicken directly onto the smoker, which results in rubbery, grey skin.
- 275°F30 min
Preheat your smoker to a steady 275°F using guava or kiawe wood. These Hawaiian hardwoods provide a sweet, floral smoke profile that complements the pineapple and ginger without overpowering the delicate chicken. Ensure your fire is burning 'clean' with invisible or thin blue smoke; heavy white smoke will make the sweet glaze taste bitter. Position your water pan to maintain a humid environment, which prevents the sugars in the glaze from burning too quickly during the long cook.
Why it matters
Maintaining a clean fire at 275°F is the sweet spot for rendering thigh fat while keeping the meat juicy.
Common mistake
Using heavy woods like mesquite or hickory which clash with the tropical flavor profile.
- 275°F1h
Place the chicken thighs skin-side up on the grate, ensuring at least an inch of space between each piece for airflow. Close the lid and smoke undisturbed until the internal temperature of the thickest part of the thigh reaches 150°F. During this phase, the fat under the skin begins to render and the smoke bonds with the proteins. Do not open the lid during this period, as temperature fluctuations will extend the cook time and interfere with the bark formation.
Why it matters
The 150°F mark is where the chicken is safe from the 'danger zone' and ready to begin the glazing process.
Common mistake
Peeking at the chicken too often, which lets out the heat and moisture needed to render the skin.
- 170°F30 min
Once the chicken hits 150°F internal, begin 'Huli-ing' (turning) and basting. Using a silicone brush, apply a thin layer of the reserved clean glaze to every surface of the chicken. Repeat this every 10–15 minutes as the temperature rises. This building process creates a tacky, lacquered finish. Continue smoking until the internal temperature reaches 170°F. Bone-in thighs are best taken to this higher temp (rather than the standard 165°F) to ensure the connective tissue around the joint breaks down completely.
Why it matters
Multiple thin layers of glaze create a much deeper flavor profile and better 'mouthfeel' than one thick coat.
Common mistake
Applying glaze too early, which can cause the sugars to scorch and turn black before the chicken is cooked.
- 175°F5 min
Move the chicken to the hottest part of the grill or crank your smoker temp if possible for a final 2-minute sear. Flip the chicken skin-side down over direct heat to 'set' the glaze and create small spots of localized char. Watch constantly—the high sugar content in the pineapple juice and brown sugar will move from caramelized to burnt in seconds. Remove the chicken when the internal temperature hits 175°F and the skin is bubbling and mahogany in color.
Why it matters
A final flash of heat provides the 'roadside' charred aroma and ensures the skin isn't rubbery.
Common mistake
Walking away during the char finish, resulting in bitter, carbonized skin.
- 10 min
Transfer the chicken to a warm platter—do not tent tightly with foil, as this will trap steam and soften the skin you worked hard to crisp. Allow the chicken to rest for 10 minutes. During this time, carryover cooking will bring the final internal temp to roughly 178°F, and the juices will redistribute throughout the thigh meat. This prevents the juices from running out immediately when the judge or guest takes their first bite.
Why it matters
Resting allows the muscle fibers to relax, ensuring the chicken is tender and stays moist even after slicing.
Common mistake
Cutting into the chicken immediately, which causes all the internal moisture to leak out onto the board.
- 5 min
Brush one final, very thin layer of the remaining clean glaze over the skin to provide a high-gloss competition shine. Serve the thighs whole or sliced across the grain if de-boned. In Hawaiian tradition, this is best served alongside mac salad and white rice. For a competition-style look, ensure there are no visible char 'flakes' or sauce drips on the plate, presenting the most uniform and vibrantly colored pieces in the center.
Why it matters
The final brush of glaze restores the 'wet' look and reinforces the ginger-pineapple top notes.
Common mistake
Serving with cold glaze or over-saucing to the point where the meat texture is hidden.
Sauce It
Cooks & Reviews
Guild members can rate this recipe, log their cooks and share photos.
Sign in to continueMember reviews
No reviews yet — be the first to rate this cook.
Ask the Pitmaster about this recipe
Substitutions, scaling, technique, troubleshooting — get answers grounded in this cook.
Sign in to try the AI Pitmaster on Huli Huli Chicken. New members get 3 free questions.
Sign in to tryComments(0)
Loading comments…